
Everett Bennett
Milford, Delaware
This page will display some current and recent projects that are in progress.
I am currently working on a project involving historical research on Fort Saulsbury, near Slaughter Beach. I have prepared an extensive PowerPoint presentation that I have that available for public presentations. I am in the process of developing a website that will parallel the PowerPoint presentation. The final phase of the project will hopefully be a book on Fort Saulsbury that will be the most complete book about the fort to date. Follow the progress online at www.fortsaulsburyde.com.
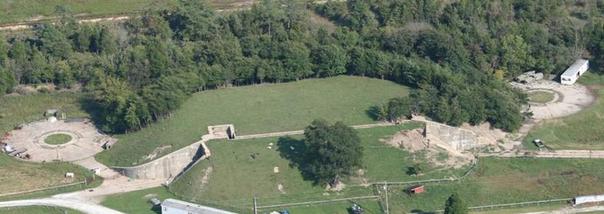
Current aerial view of Fort Saulsbury's Battery Hall
OLDER COMPLETED PROJECTS
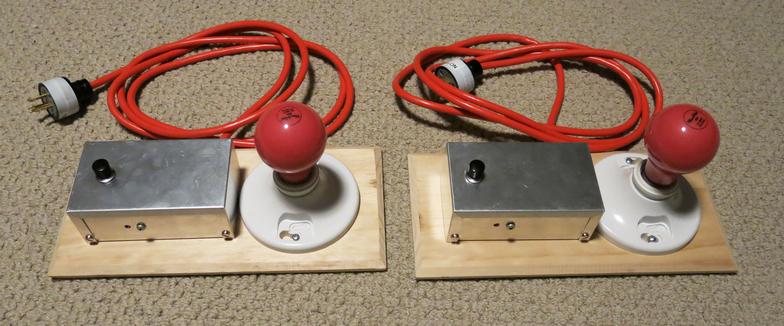
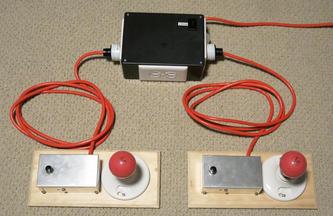
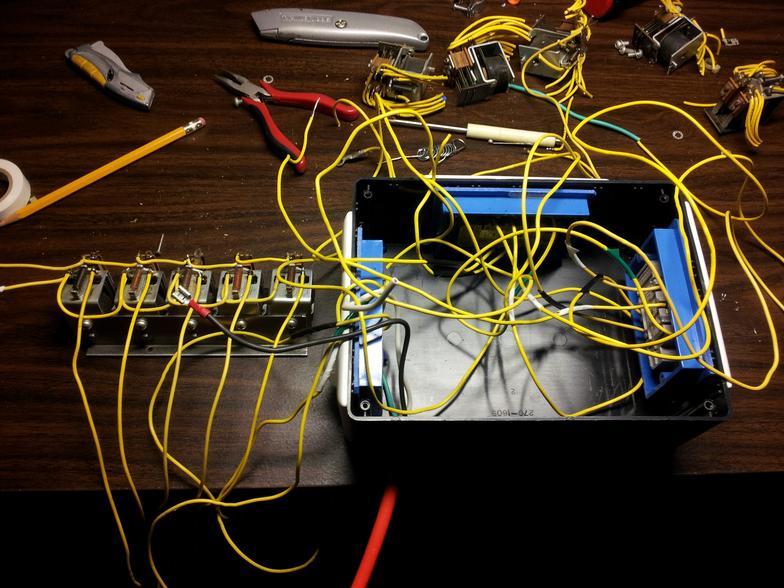
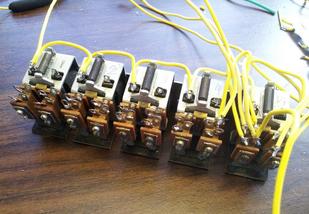
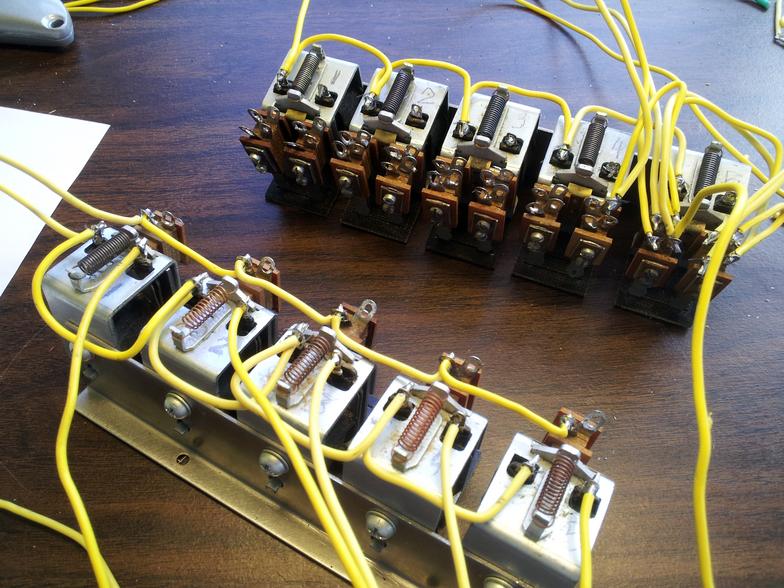
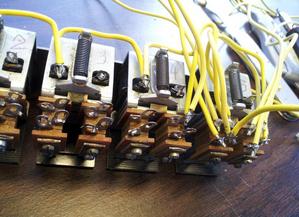
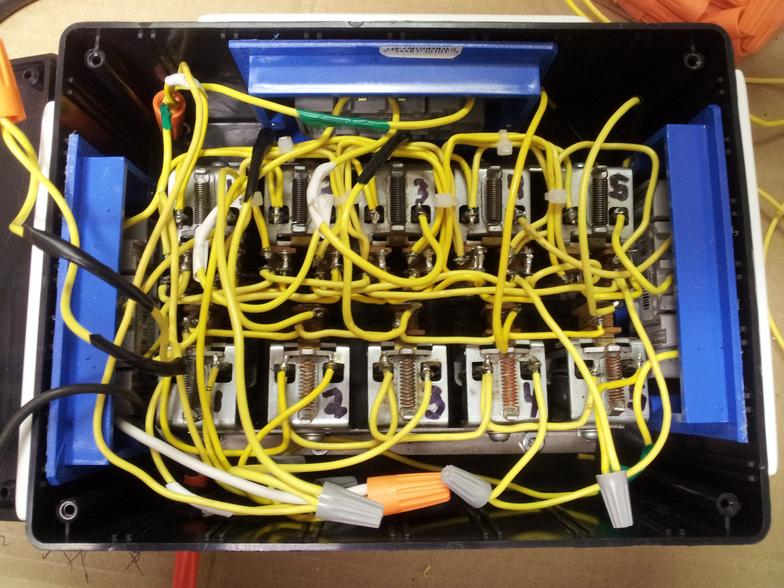
I completed a fun project requested by my son-in-law. He wanted a "Jeopardy" type buzzer control to use in his classes for students or teams of students to answer quiz questions in a game format. After explaining what he wanted, I started to sketch ideas on napkins and scraps of paper. I finally put together ideas that were used in the finished product. There were never any complete drawings, just ideas. There was a lot of "make it up as you go." The interesting part of this project is that I used old relays and parts from control panels used in the dairy industry. Here are a few pictures of the main control panel during construction.
A woodworking projects
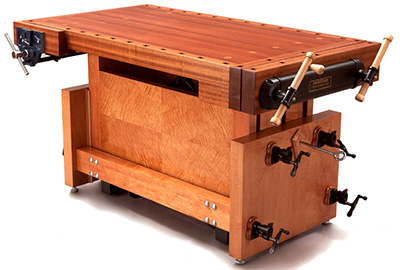
The latest project that is not yet started is an adjustable specially designed workbench. A finished product picture of what it will look like is pictured at right.
Finished Project examples:
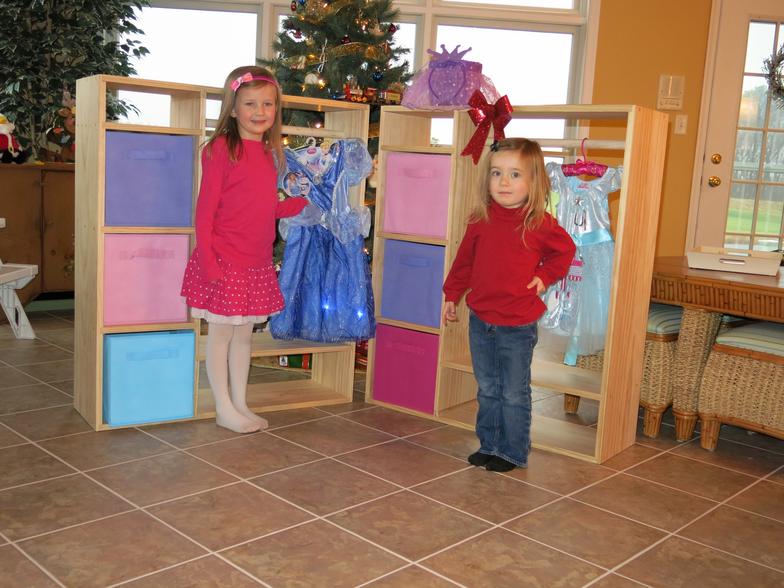
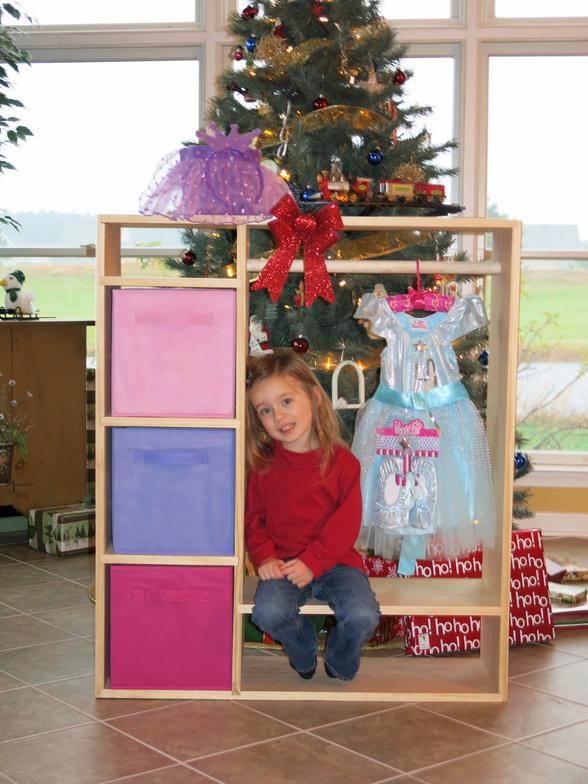
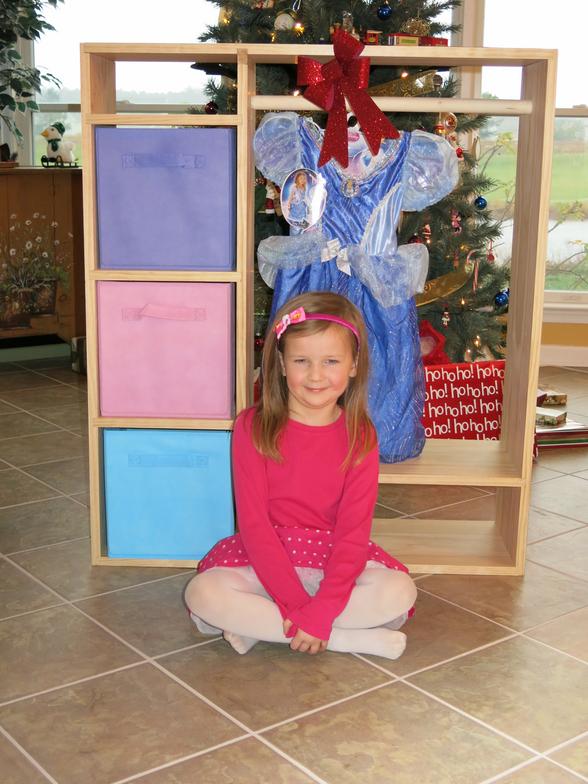
Of course I had to build two of the play dress-up wardrobes. The granddaughters can hang their play clothes and have room for the shoes and other items they have like "Magic Wands" etc.
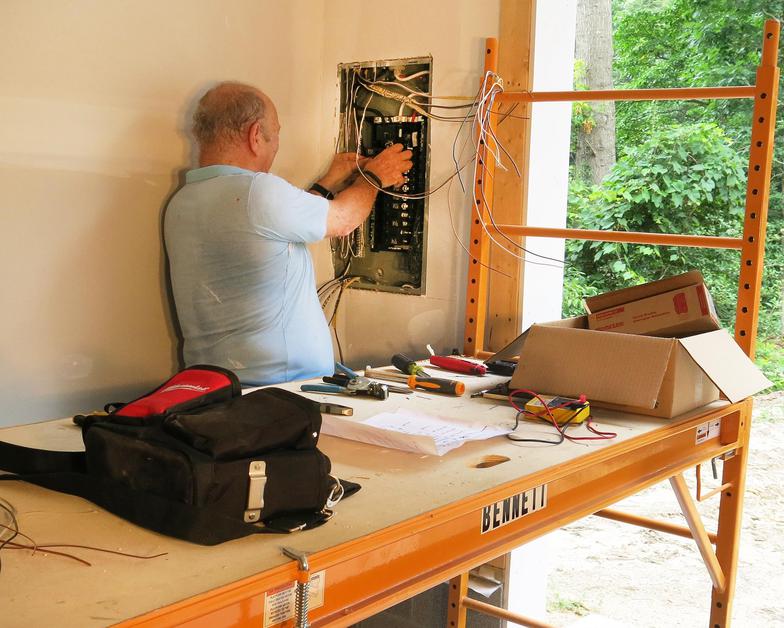
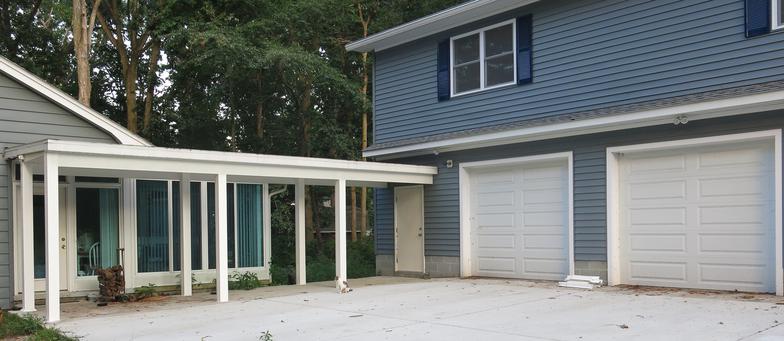
Major Garage Project
The control panel connected with two of the buzzer controls is pictured above. There are five buzzer buttons for five players/teams like the two that are pictured. When a button is pushed, the red light comes on for that player and everyone else is "locked out" for that question. The moderator then pushes the reset button on the master panel for the next question.
* * * * * * * * * * *
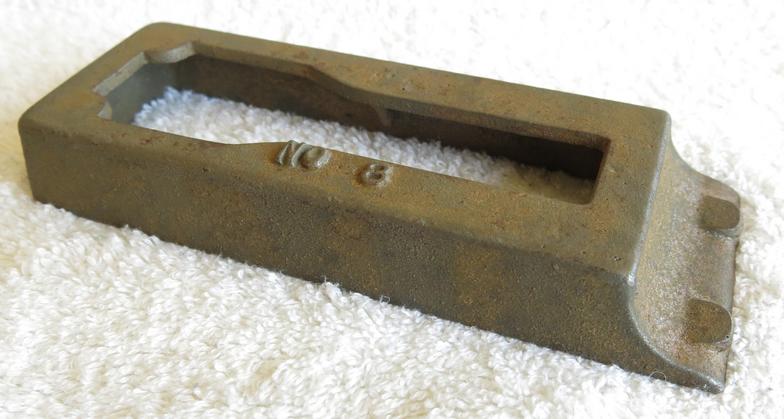
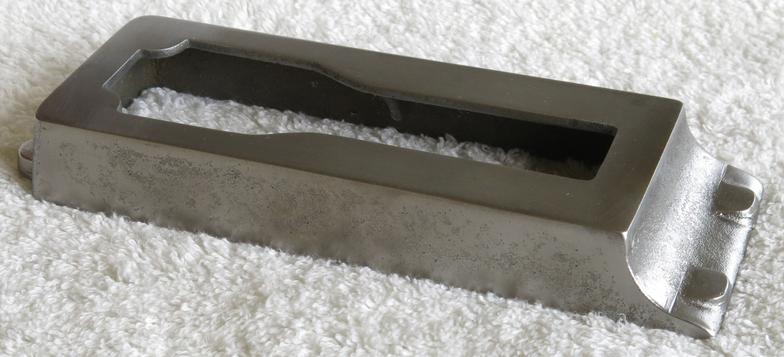
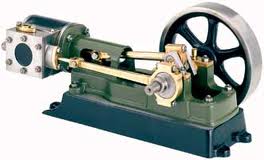
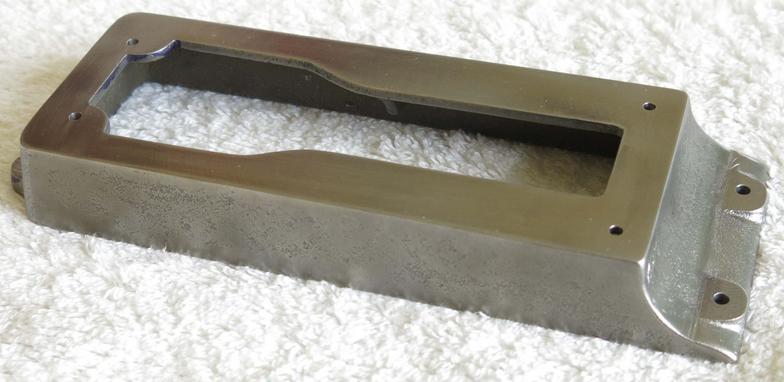
Starting a Steam Engine
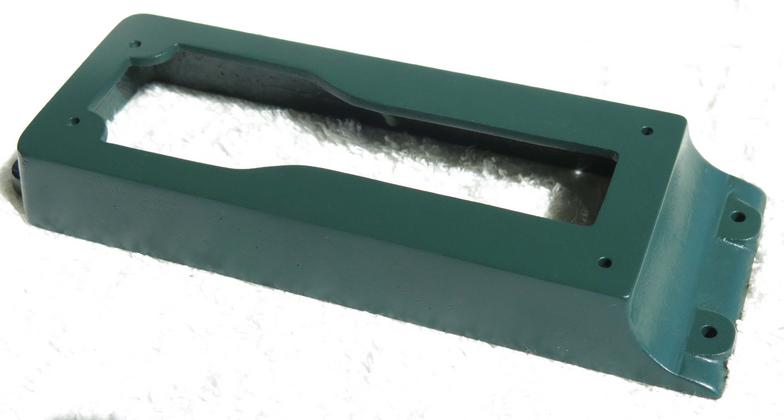
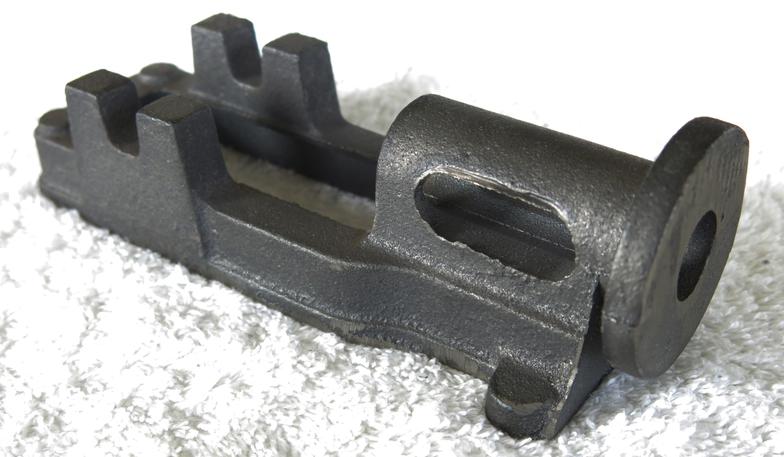
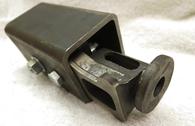
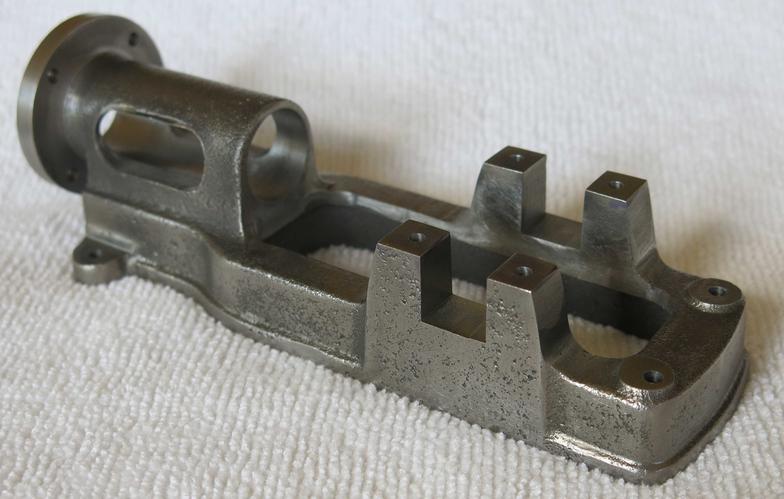
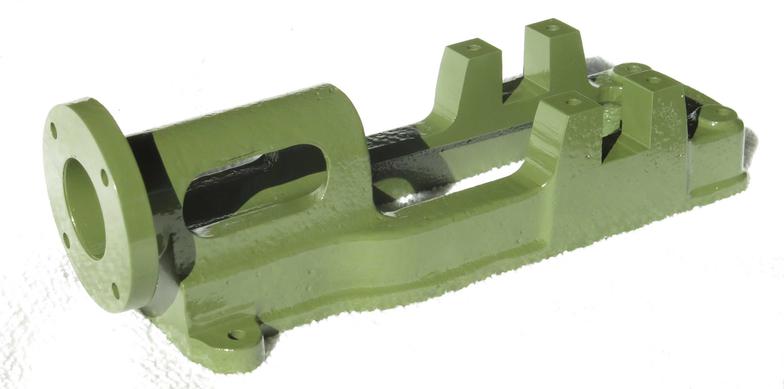
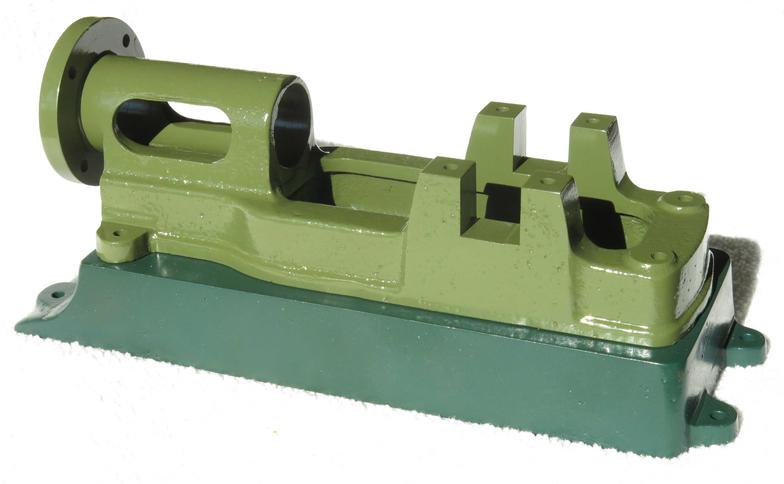
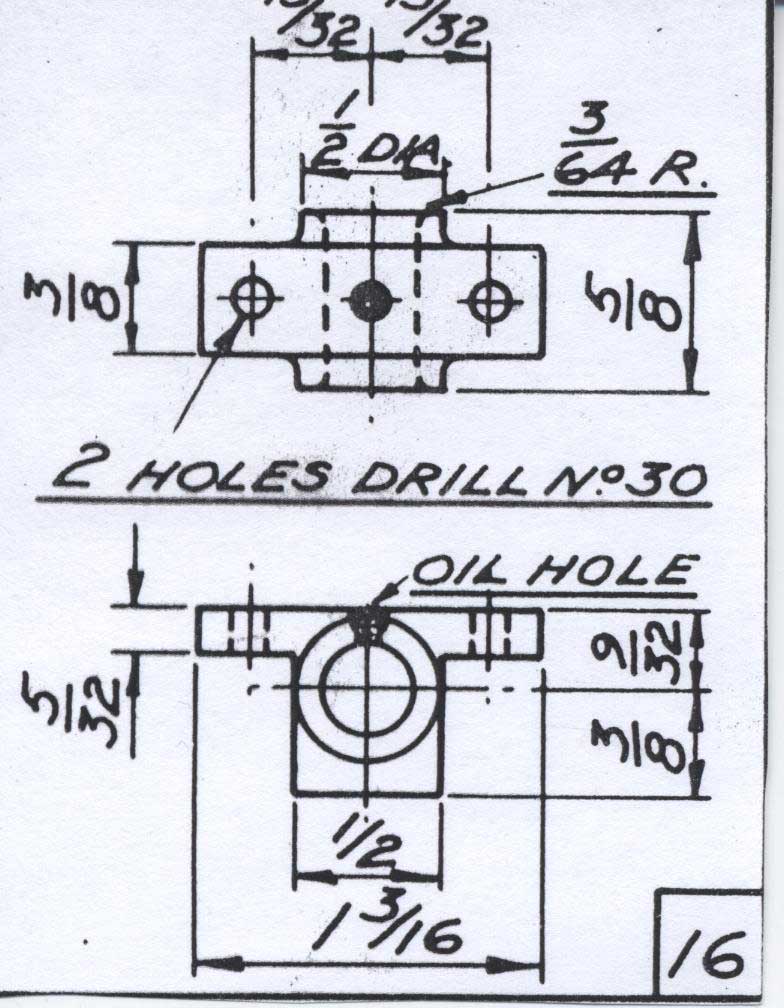
I have started building a steam engine from castings. It is a Stuart Model of the "No. 8" engine like a completed model pictured to right. You can see more about the steam engines under the "Hobbies" Tab, but I thought I could report the progress as a project. The picture at the left is the unfinished casting of the base for the engine. The casting has to be machined to proper dimensions and then drilled and tapped for any fasteners. The work is typically done on a lathe or by hand. I will post updates periodically as it is a slow process especially based on "free" time.
Casting of base before starting Machined base ready for drilling Drilling completed ready to finish Completed base part
Untouched casting of main frame
Special holder had to be made for machining
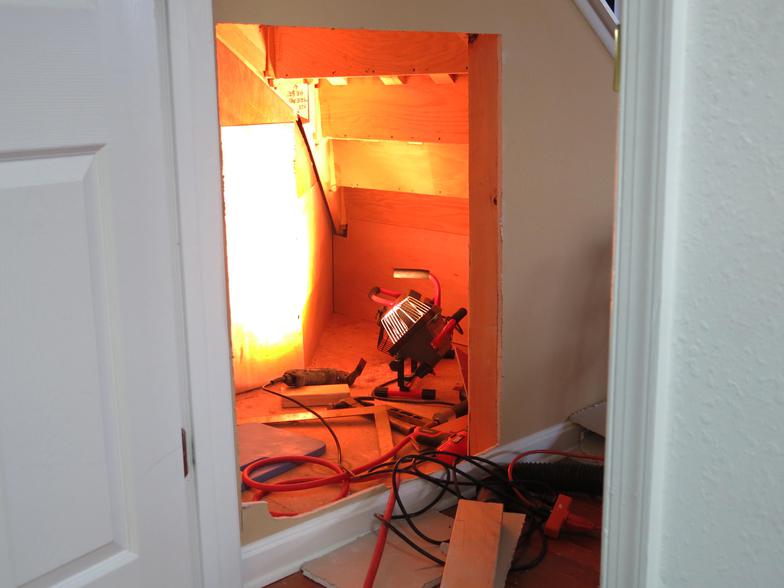
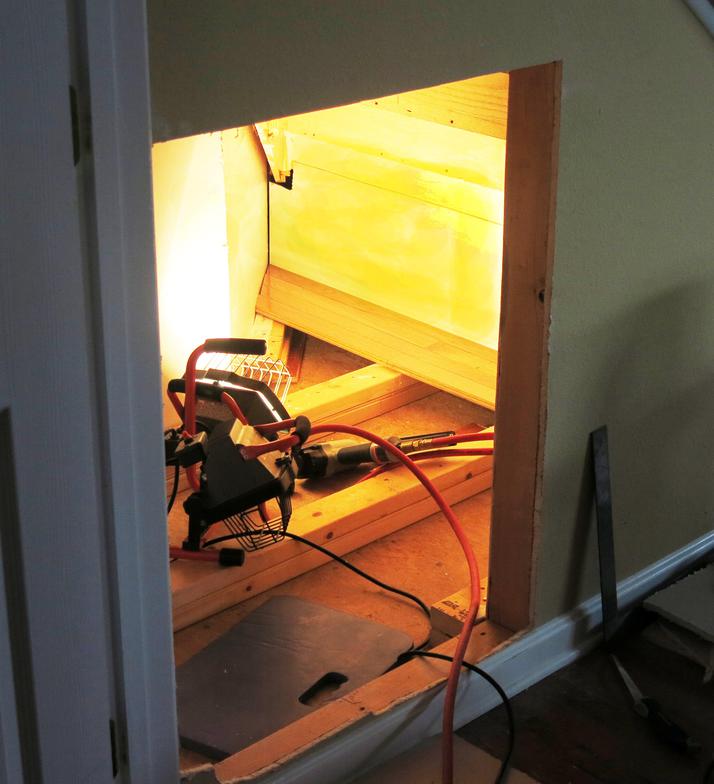
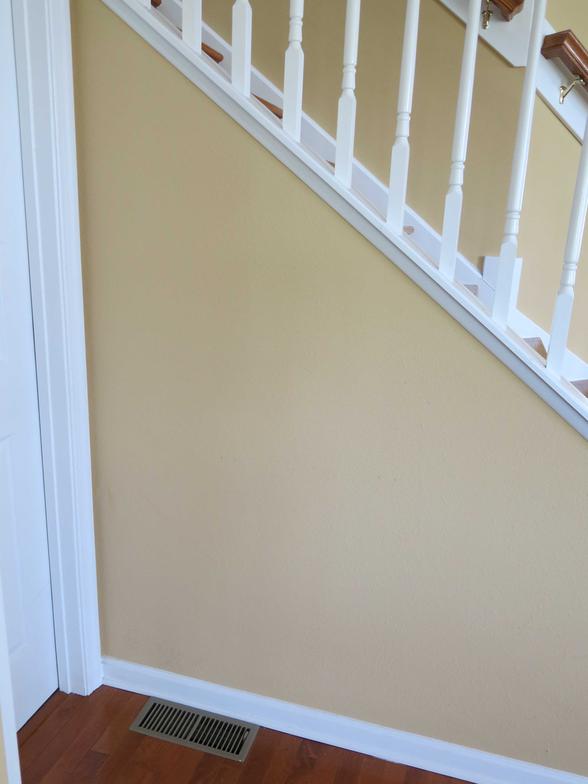
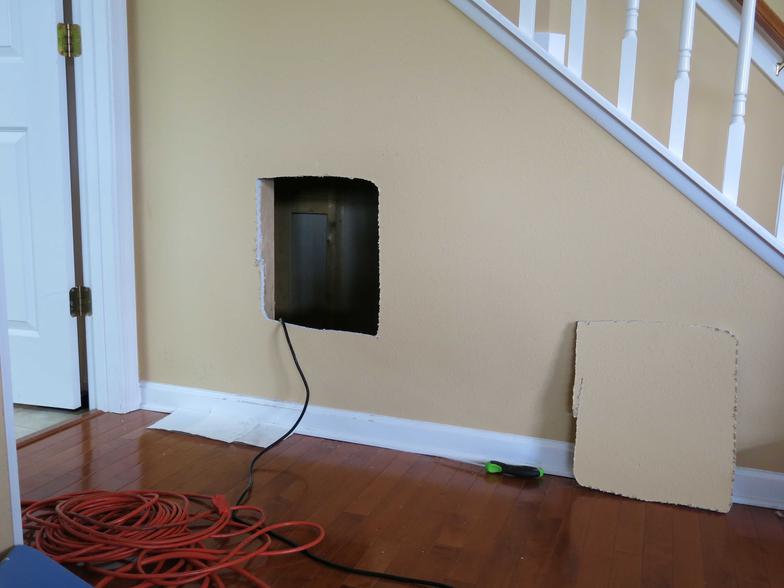
A more recent Project: Under Stair Closet
This is a project that just evolved. The grandchildren had their toys that were basically stored in a pile in the family room. The stairs were nearby and it seemed there was a lot of wasted space underneath that could be better used. It was determined that we could build a "closet" underneath that could be used to store the kids toys. A project began to convert the unused space to something useful. Here are a few pictures that show how the transformation took place. It was a project that had a lot of challenges in the construction process since there were no "blueprints." The work involved was mostly a carpentry project.
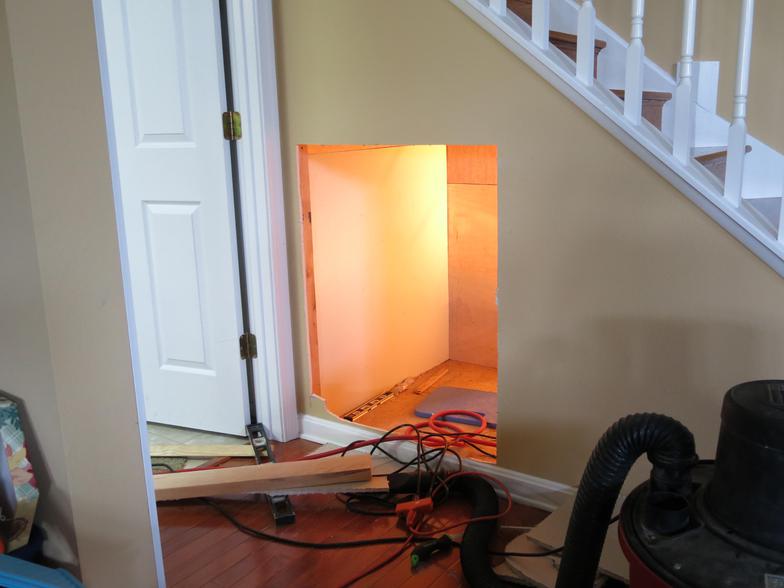

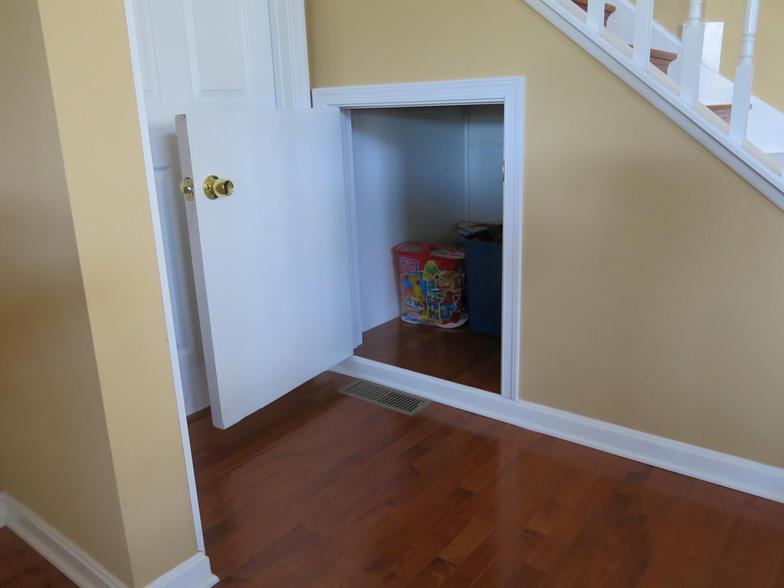
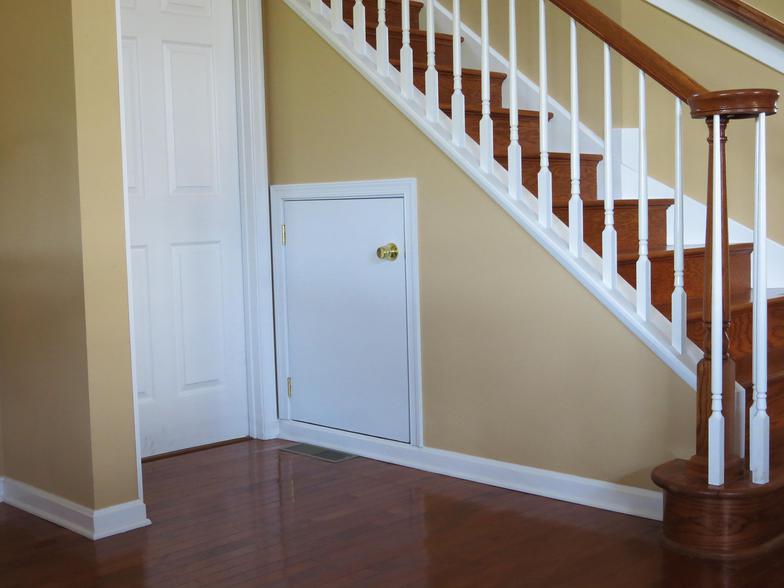
Project completed showing the door open at left and what the finished project looks like above. It turned out to be a neat idea.

I was experimenting with the idea of a logo type sticker using PhotoShop. My thought was since I have had so many projects, I should have a label for them. At least I had fun designing it.
A Recent Project
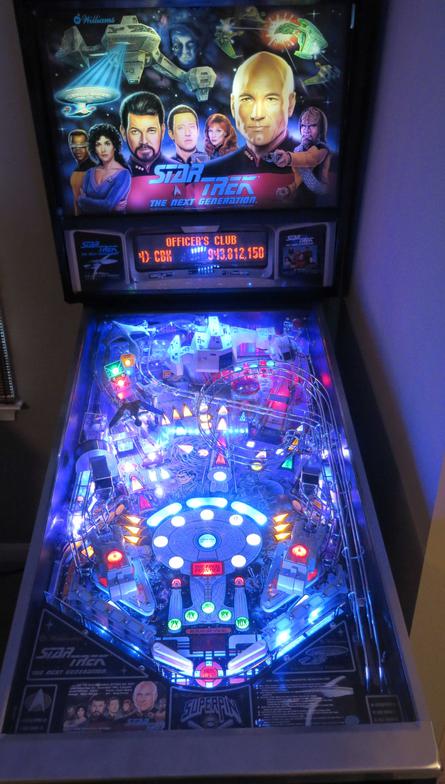
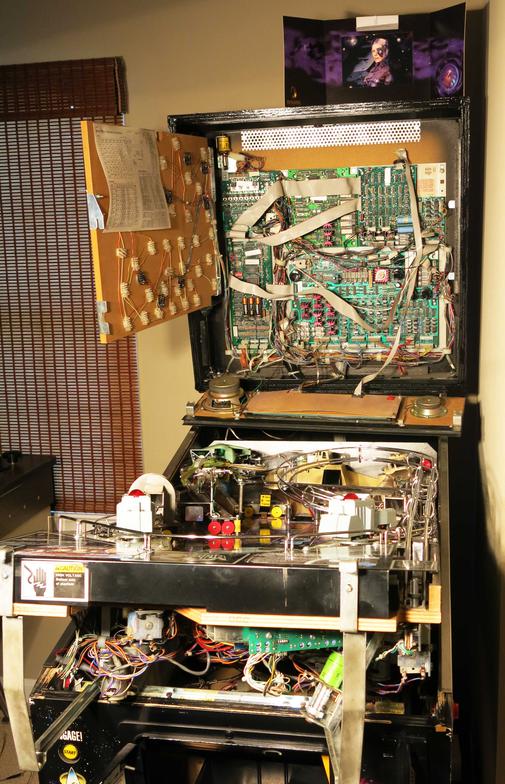
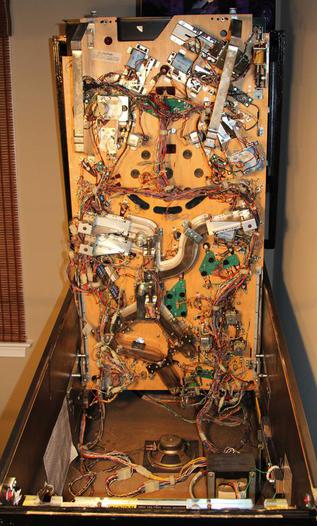
We have a Williams Star Trek the Next Generation Pinball machine in our game room. It is challenge to keep the game in great operating order since I am not a pinball repairman. Further, to have a technician work on it would be expensive and that is if we could find one. Therefore, one has to learn how to do it themselves which is actually a fun thing. I recently purchased a LED lighting kit upgrade for the machine where every light bulb in the machine had to be changed.
Here are a few pictures of the process with the machine opened and then one of the completed project. Success.
I will be adding come close-up shots of the play field later.
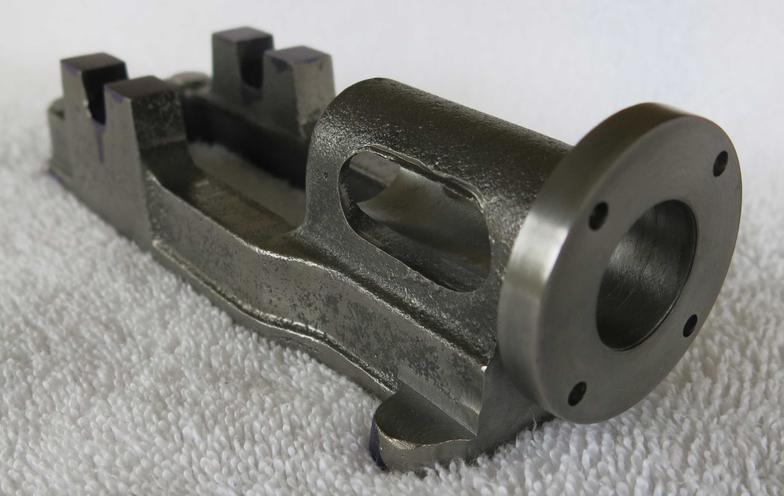
Work is progressing on the main frame. Needs a little more milling and 8 more holes to be drilled.
An ongoing Project (Hobby)
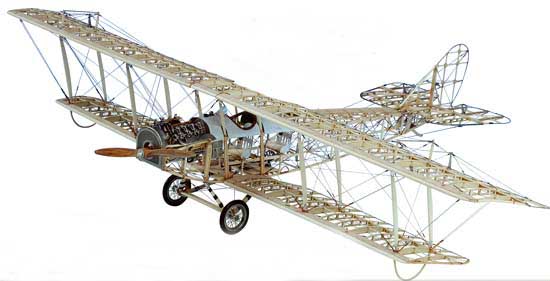
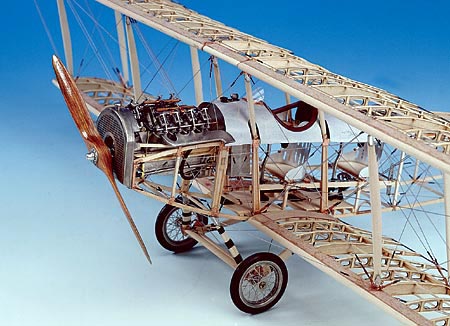
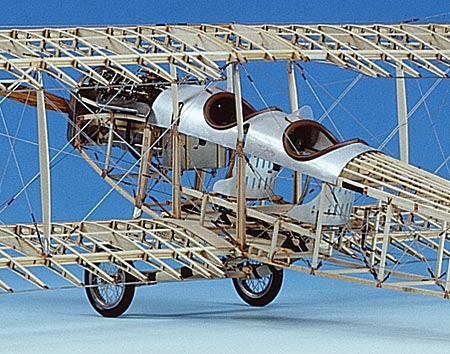
I have just started the construction of a very detailed model of the 1917 Curtiss JN-4D Jenny. This is going to take awhile to build. Here are some pictures of what I am hoping it will look like when I am finished.
I worked on it some in an afternoon and evening and only got a very small amount completed. I had to make 80 pieces of wood 1/64th" x 1/16th" x 1/8" and glue them in place (very small pieces). I have about 300 more pieces of that size to make and glue on the wing ribs. (All done under a magnifying glass using tweezers.)
Machining has been completed
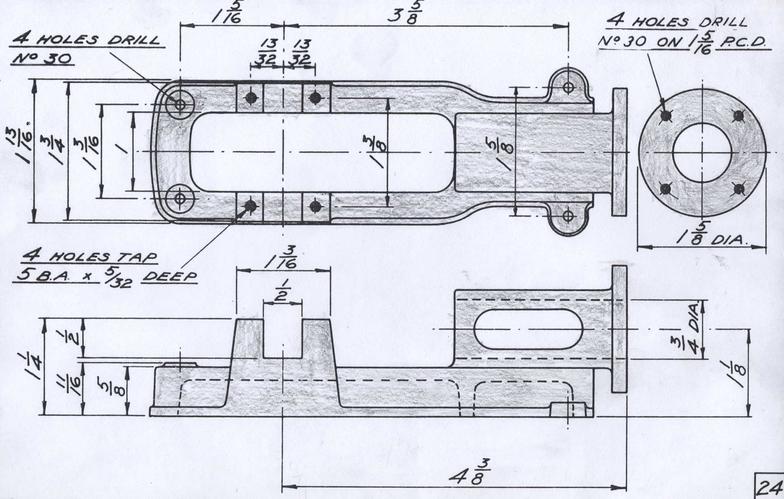
Specifications on how to machine main frame
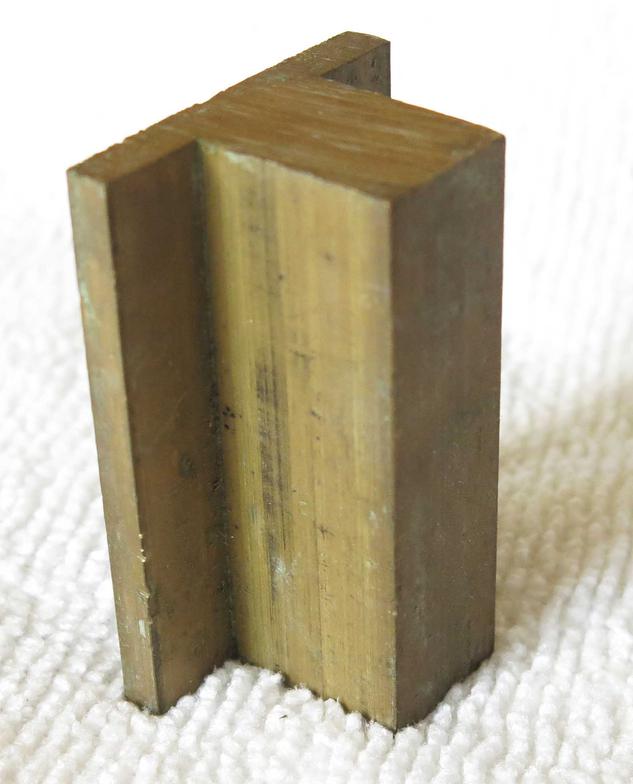
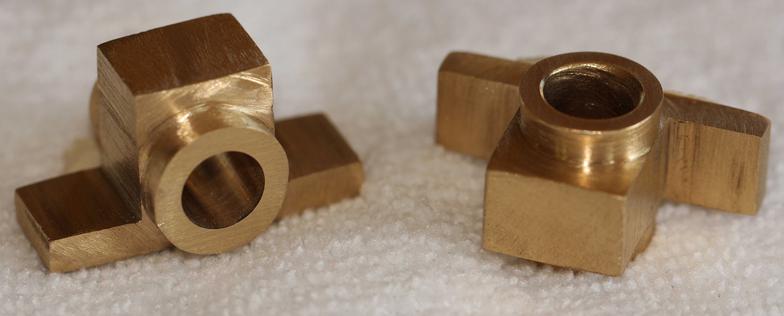
The two crankshaft bearings above were made from the "T" shaped blank material. Holes still need to be drilled. They fit in square sections of the main frame. Plans shown.
Main frame painted - 2nd piece done
First two pieces stacked - a lot more pieces to go.
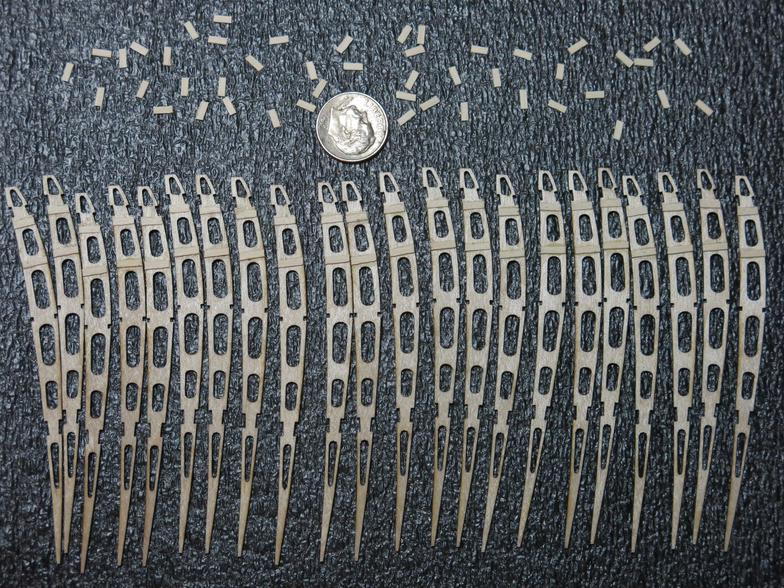
Here is a picture of 22 of the wing ribs with a dime showing the relative size. Each rib has 7 stiffeners on each side for a total 14 per rib. These 22 ribs require a total of 308 little pieces to be made and glued into place. The 44 little pieces at the top are shown ready for the next gluing process. If you look closely, the first two stiffeners have been glued at the top.
Most Recent Project Just Completed
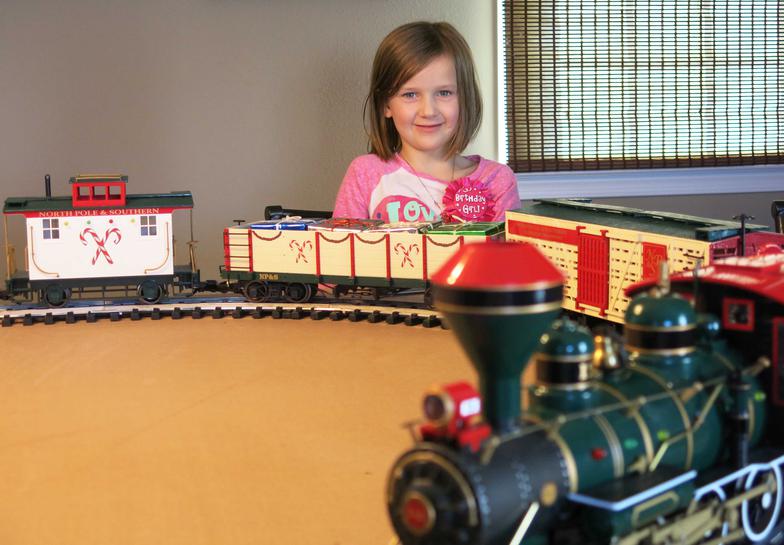
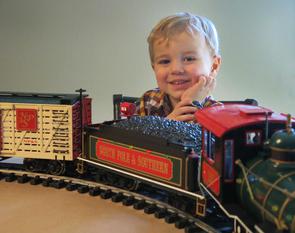
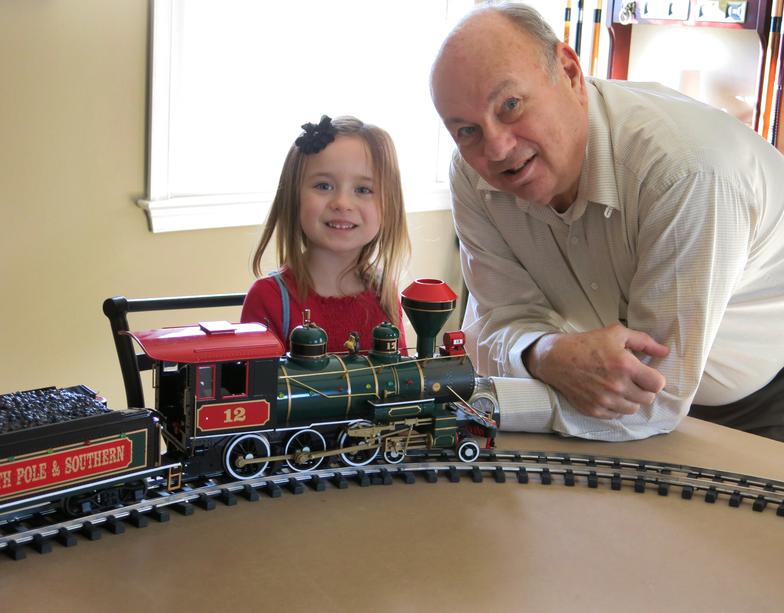
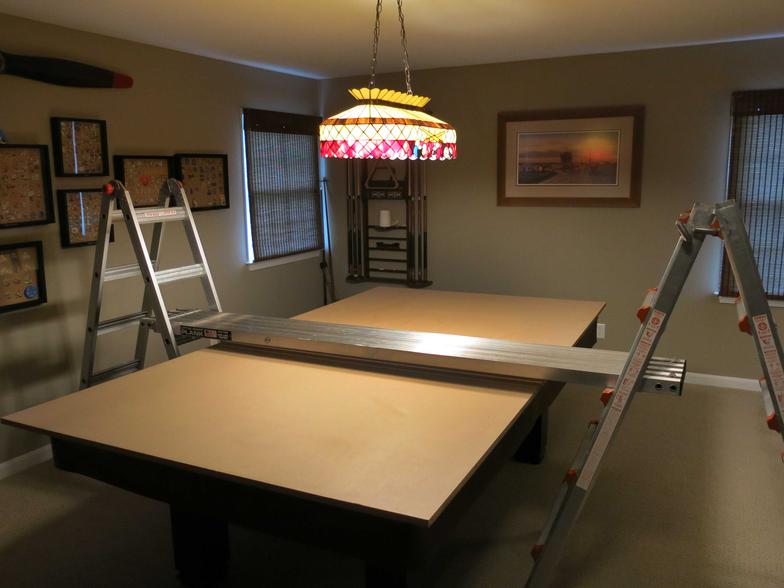
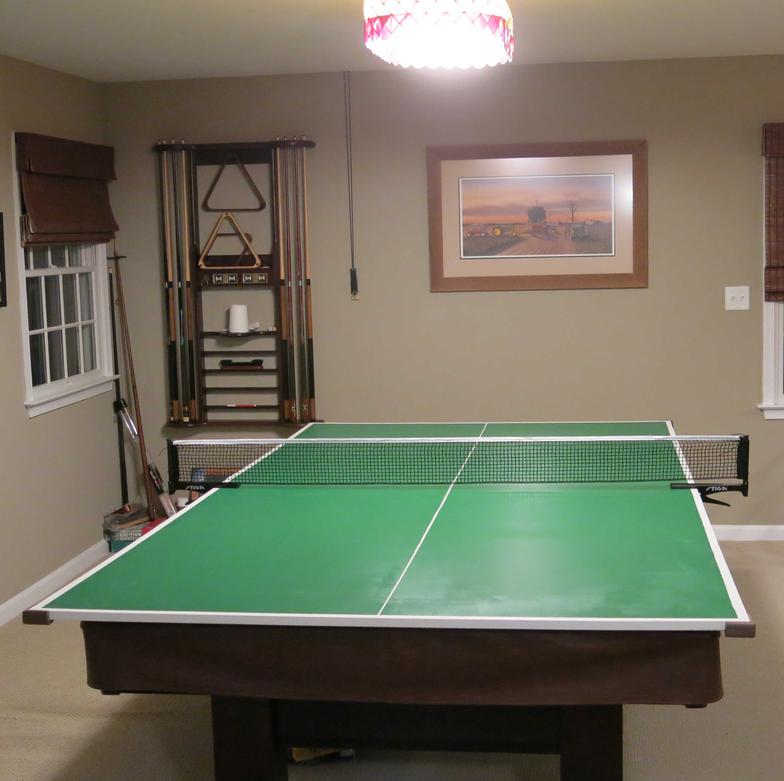
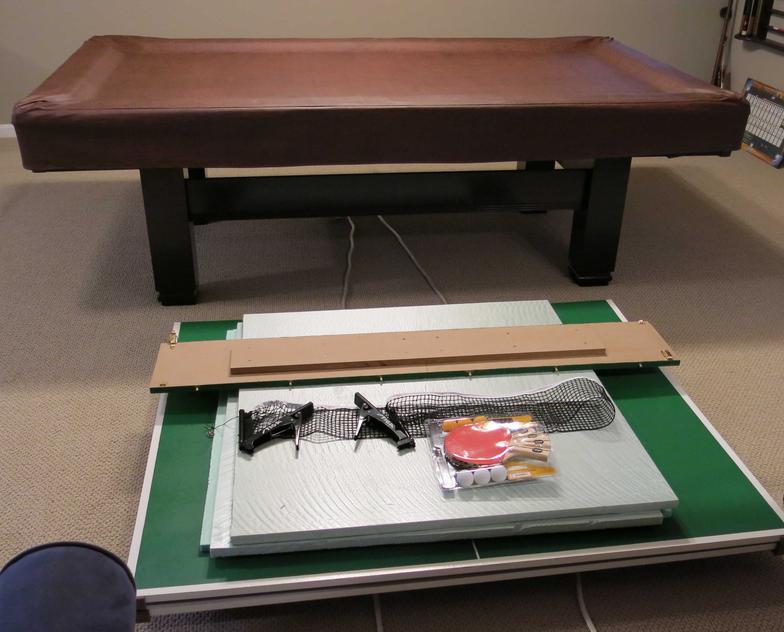
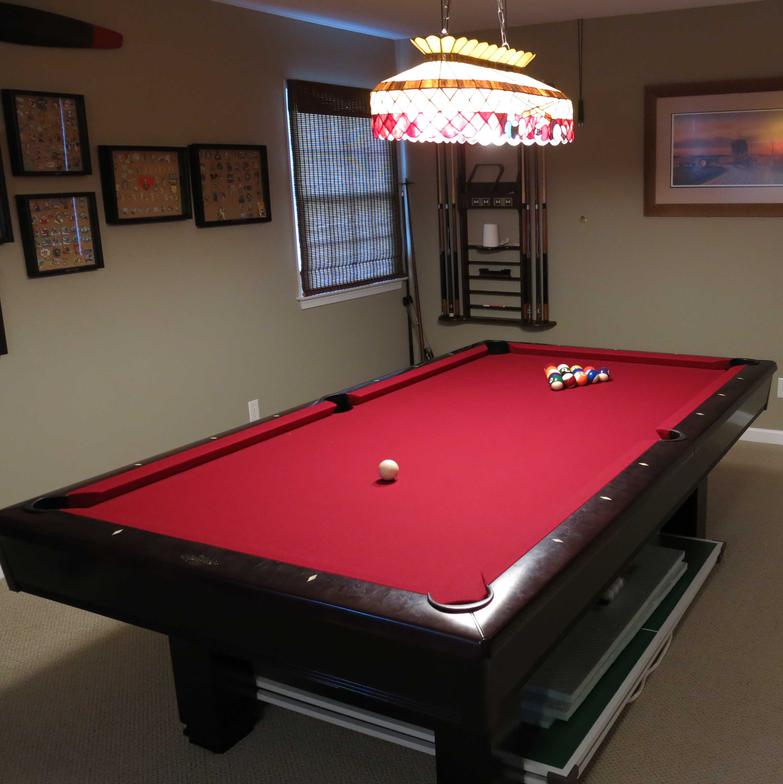
Here is an example of how projects just seem to grow. The initial event was to find a place for a train to be used for the grand-kids during Christmas. We decided that it would not be good to have it go around underneath the tree. The final idea was to mount something like plywood on the pool table and set up the train on the "table." That idea worked great as we finished it just before they all arrived for Christmas. Here are some pictures of the kids having fun with the train set.
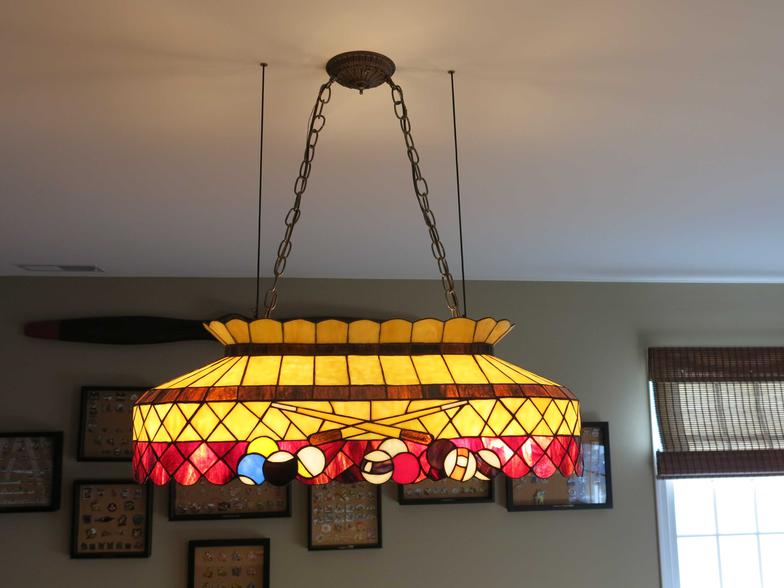
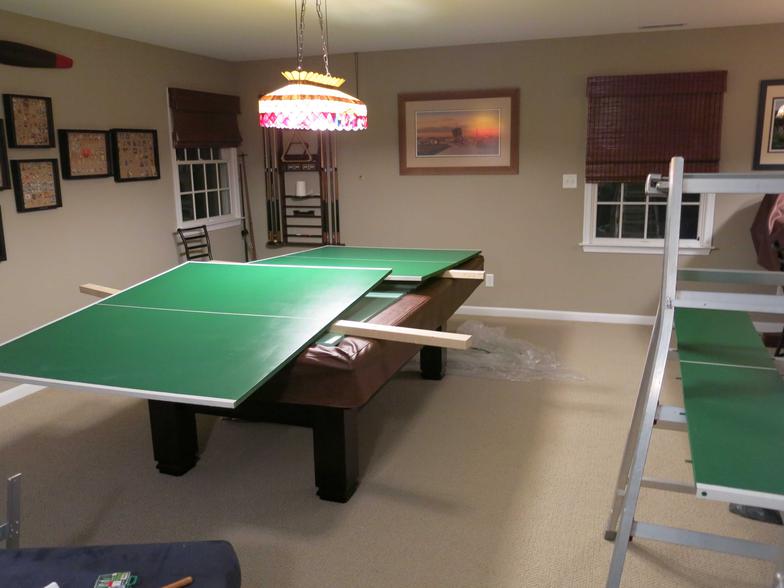
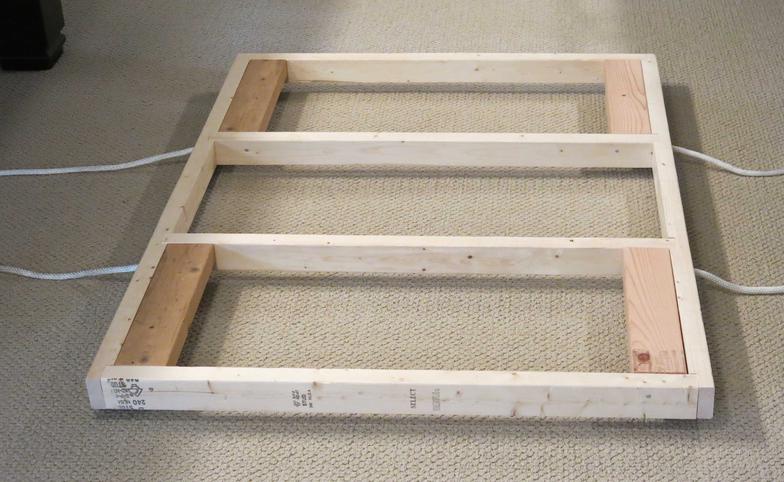
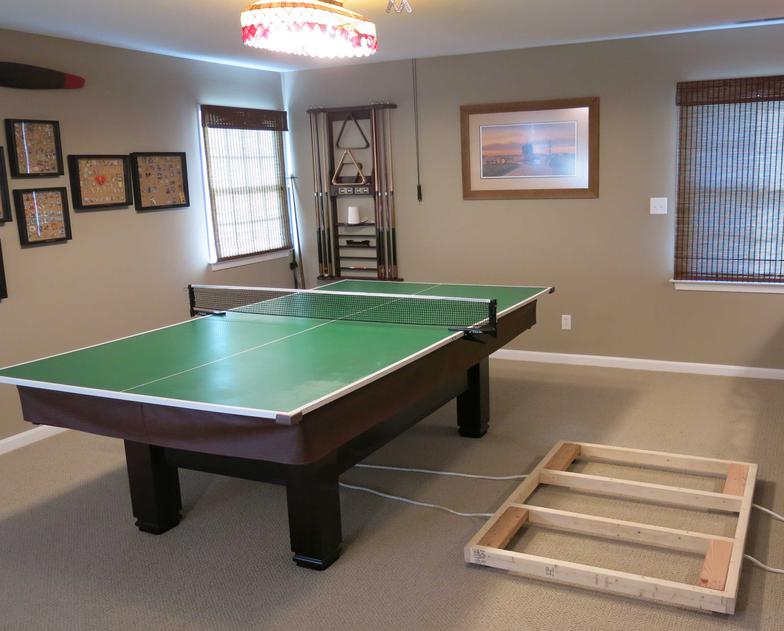
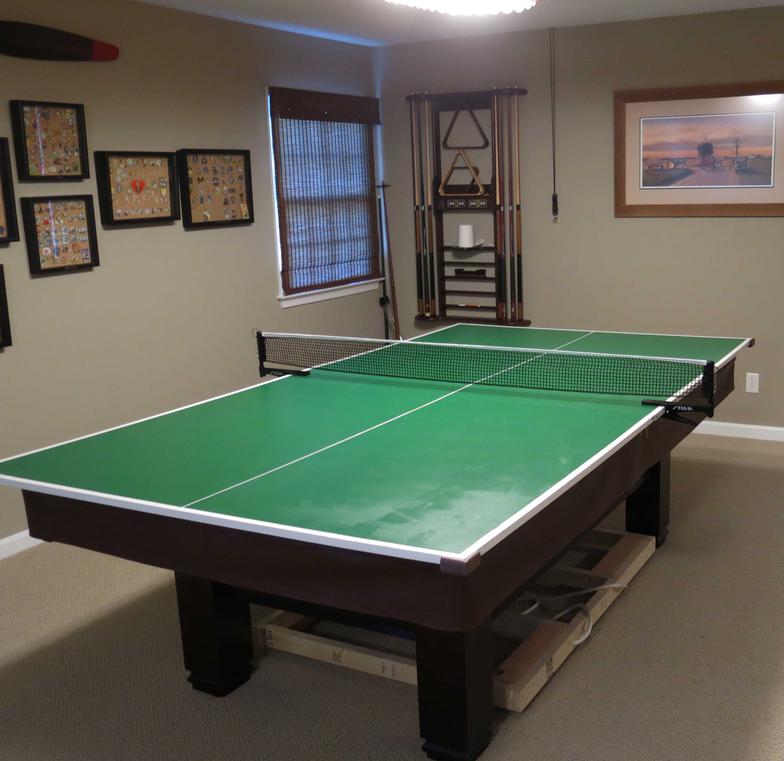
So the first phase was a success. When considering the table top for the train, I was thinking that we could perhaps have a top to also play Ping Pong and make better use of the top. I cut the pieces so that they would also work as a Ping Pong table and after Christmas and the train was taken down, I started work on preparing the table for Ping Pong. The first problem observation that we had was with the light over the pool table. It was too low for Ping Pong. Back to the drawing board to figure out how to make an easy adjustment to the height of the light over the table. The light needed to be lowered for pool and raised for Ping Pong and it had to be a simple adjustment. The design became one of using a pulley system in the attic for parachute cord connecting the light with an adjustment device to raise and lower the light. Here are some pictures of the progress.
Here the table is starting to take shape and staging in place to reach light.
Here the light part has been connected to the parachute cords that run up through the ceiling to pulley system showing the light in the down or normal position.
Table stripes being added.
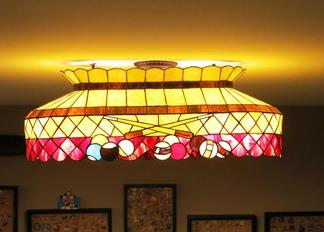
Here the light is shown in the elevated position for Ping Pong.
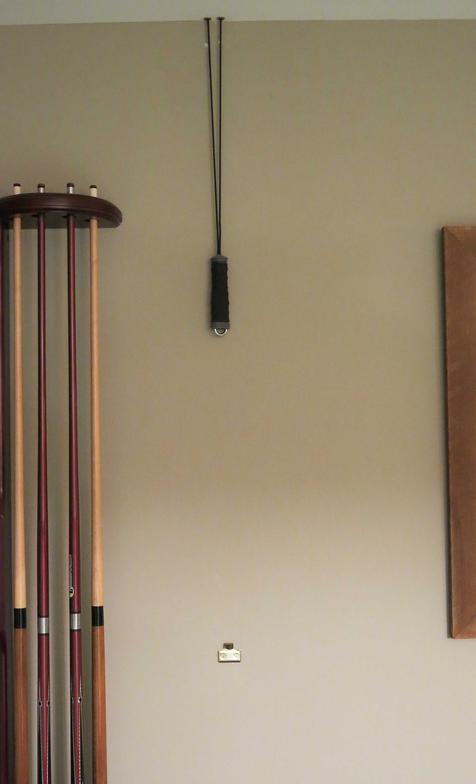
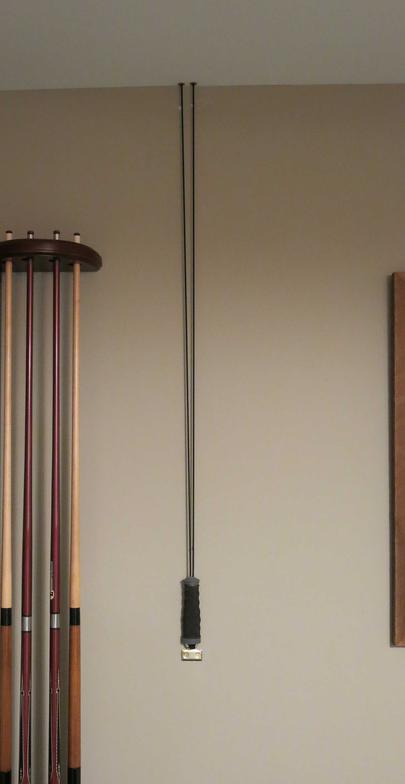
These pictures show the control cord for the light fixture. The picture on the left shows the light adjustment in the "down" or normal position for Pool. The picture on the right shows the light adjustment in the the "up" or elevated position for Ping Pong. To raise the light, just pull down and place ring on hook. Just unhook to lower.
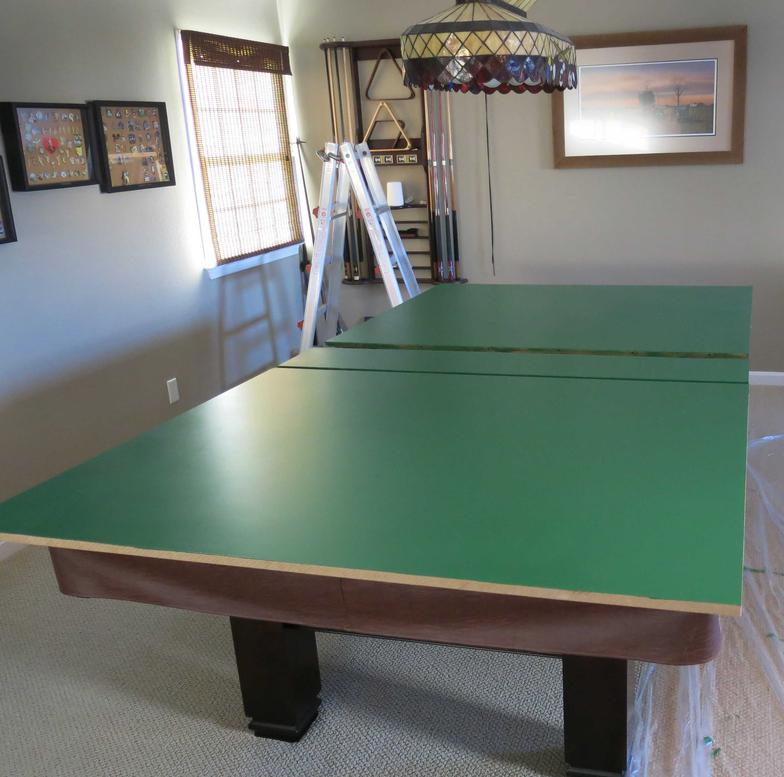
Table starting to take shape with painting done. More assembly needed and white border lines are needed.
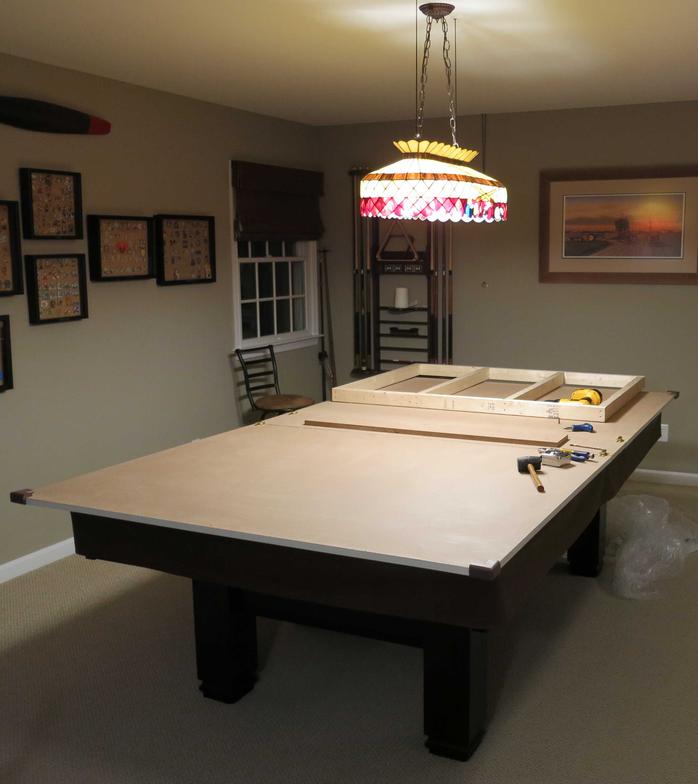
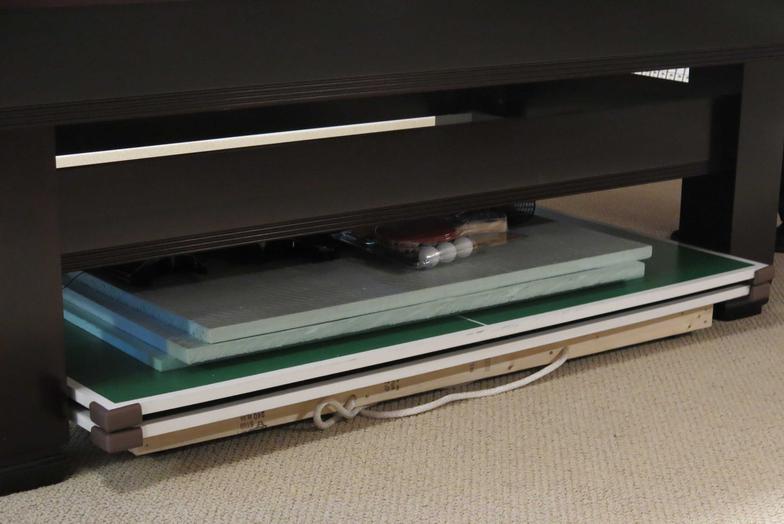
Underside of table having retainers added. Also, the under table storage cart is starting to take shape. Light is in down position.
(Table) Tennis anyone? Almost ready to play. The light is in the raised position for Ping Pong.
After the table was built, the question became what to do with it when you wanted to play pool. So a storage cart had to be designed and built. Here is a picture of the finished product on rollers. The rope pulls assist in placing it under the pool table.
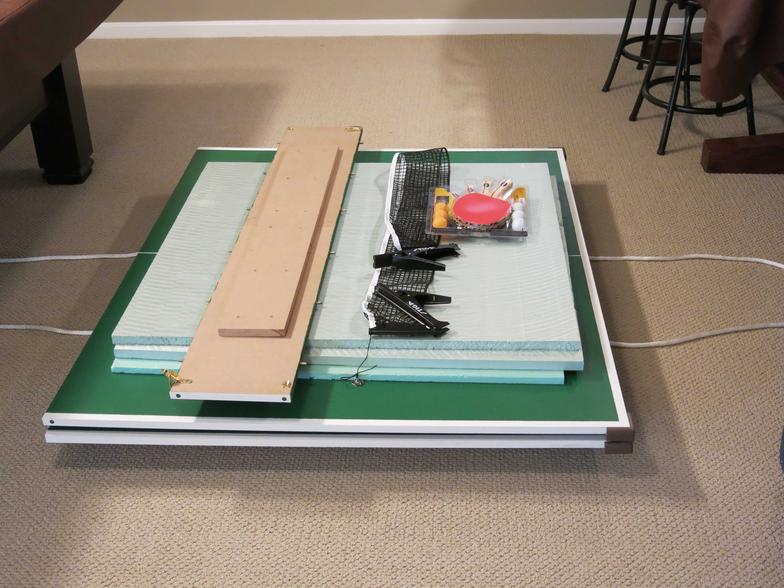
Here it is in Ping Pong configuration with storage cart ready to stow Ping Pong table.
Here is the Ping Pong table removed to ready the pool table for play. The cart is then rolled underneath the pool table with the ropes.
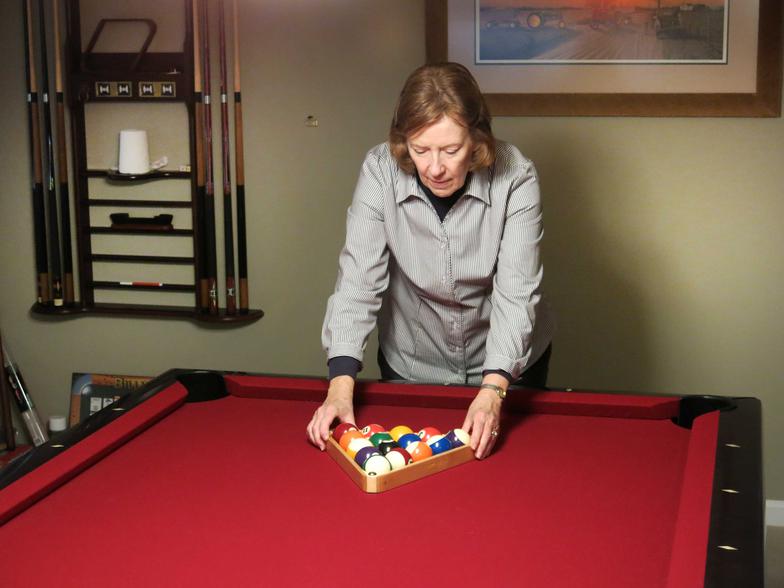
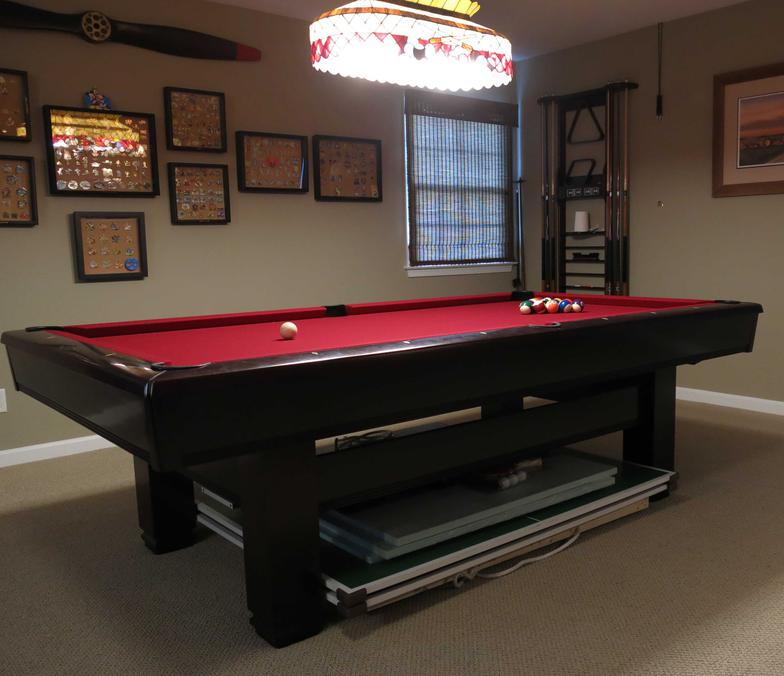
With the Ping Pong table stowed, get ready for some pool.
So there you have it, the finished product. POOL (light is down) or PING PONG (light is up). Either way, the conversion takes about 5 minutes. Changing the light elevation takes 5 seconds.
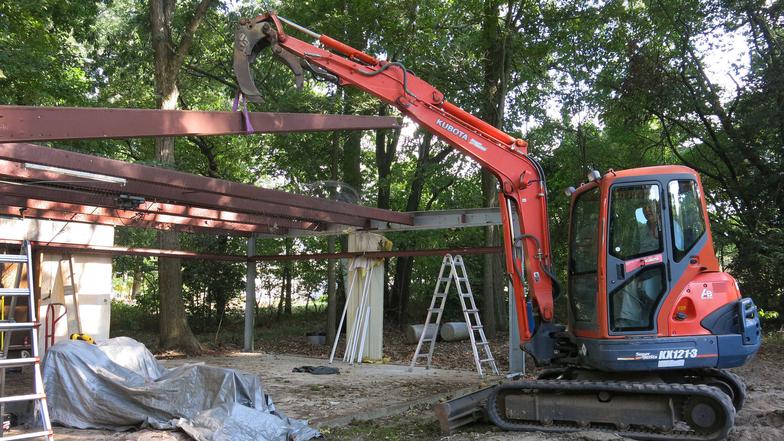
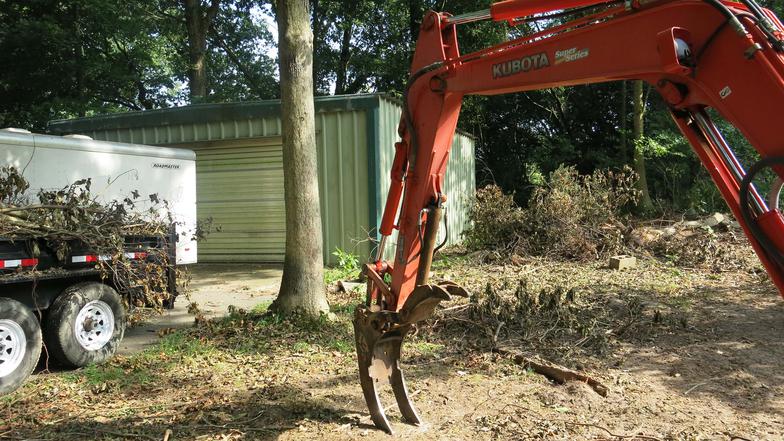
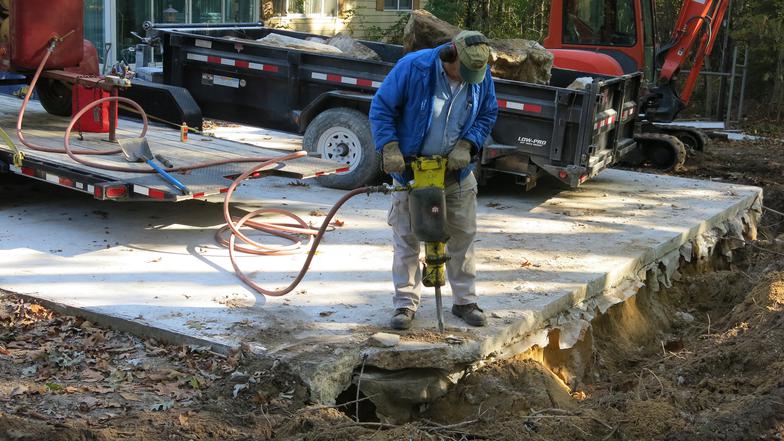
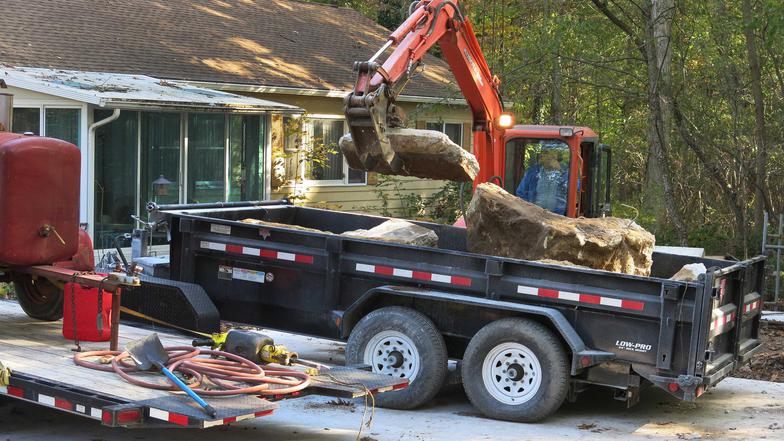
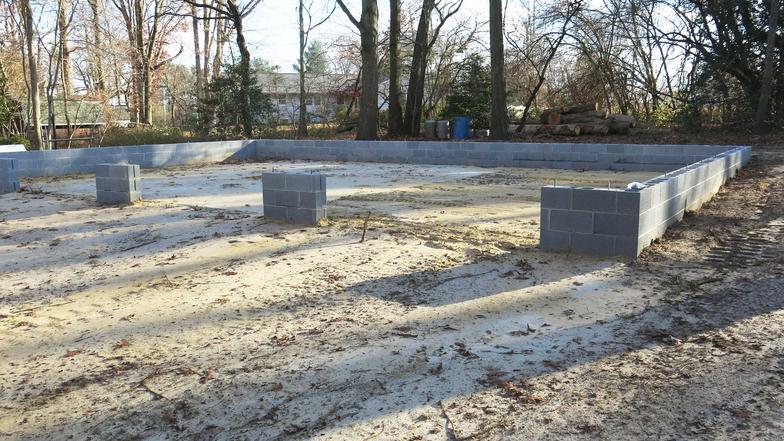
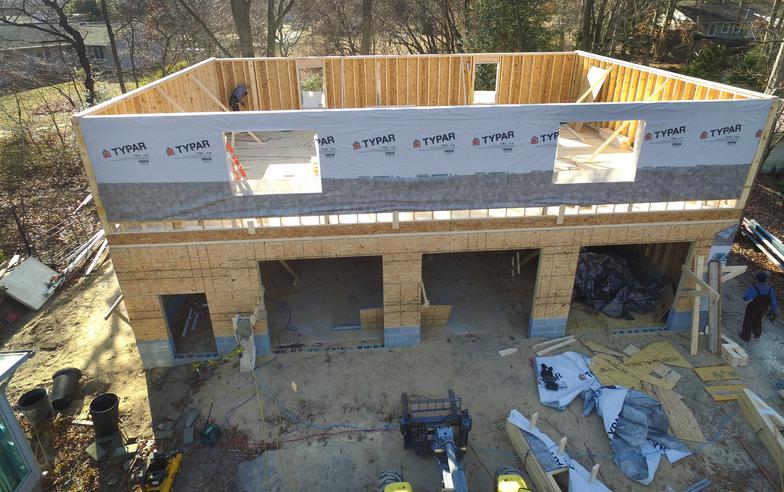
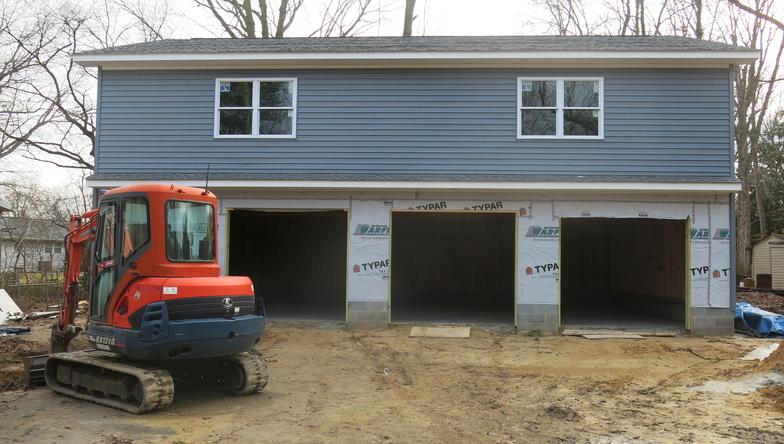
Starting with old garage in background Taking down 30' beams Breaking out old concrete for new footer
Loading old concrete footer pieces Foundation ready Framing in progress
Siding being added Wiring electric panel Almost done
Picture Framing Project
This special framing project was a successful attempt to frame four pictures. Two prints were old farm scenes with steam traction engines and two were pictures of old sailing vessels. The unique part of this project was that I wanted to use slats from the old corn crib at the farm for the frames. As a youngster, one of my jobs was to pull a loaded hopper bottom trailer loaded with corn from the field to the corn crib and empty the corn into the corn crib for storage. The empty trailer was then taken to the field and the process was repeated. The wooden slats were approximately 80 years old and that made the project more difficult because of the rough sawn irregular sized slats. I decided to use the frames for the steam engines with the weathering in tact. For the sailing vessels, I removed the weathering down to bare wood and then stained the wood.
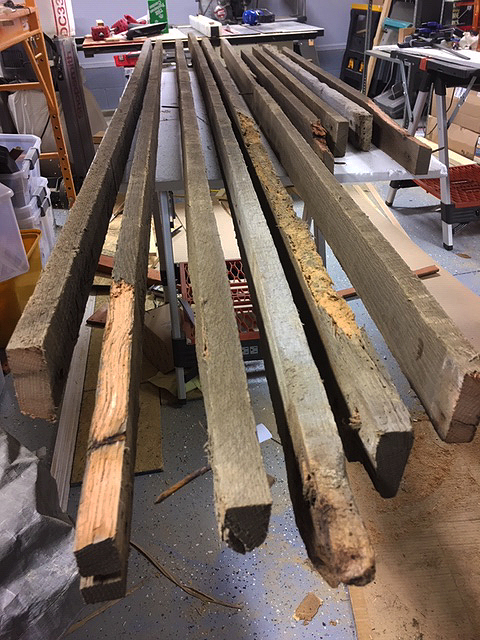

These pictures show what the wood looked like as it came off of the corn crib. Some of the wood was rotten, bowed or otherwise damaged. The selection process was not easy, but the second picture shows the beginning of picking out some good wood. The last picture shows what the natural wood looked like.
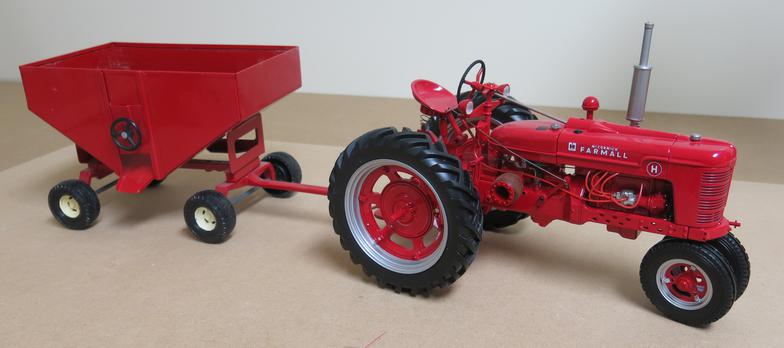
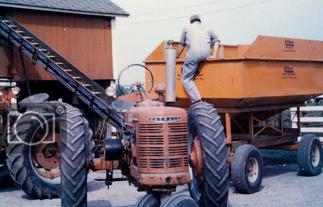
The picture on the left is a toy model of what the equipment for hauling the corn looked like. The picture on the right is a representative photo of the process.
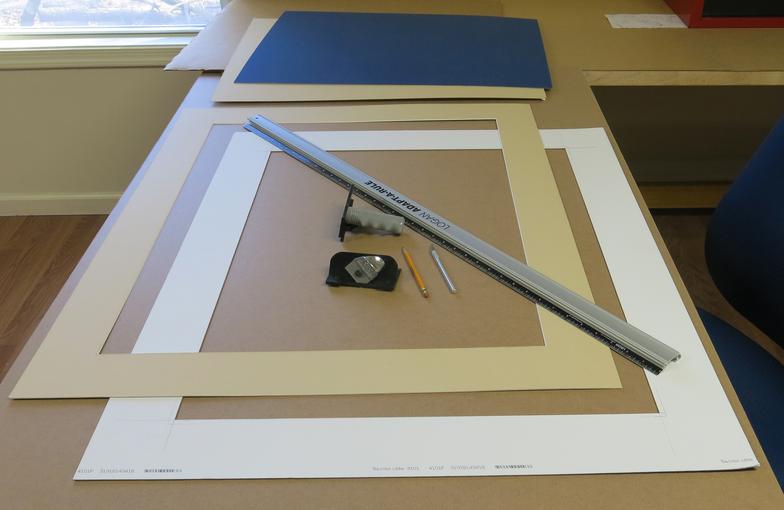
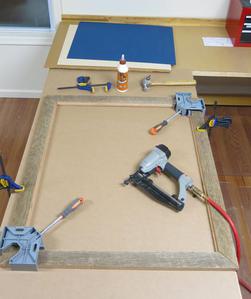
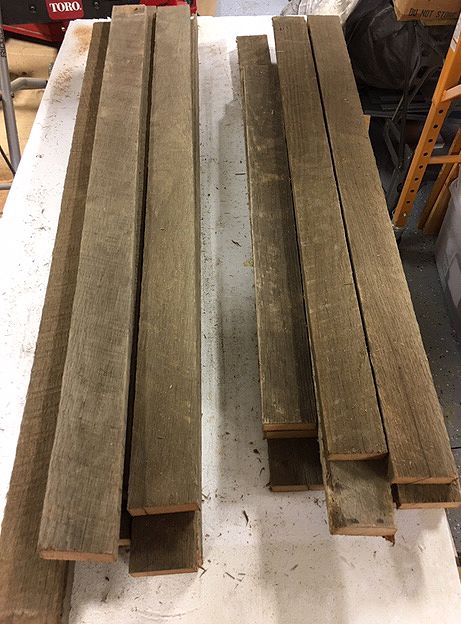
The frames had to be constructed and the double mats cut along with getting the glass and doing the mounting hardware.
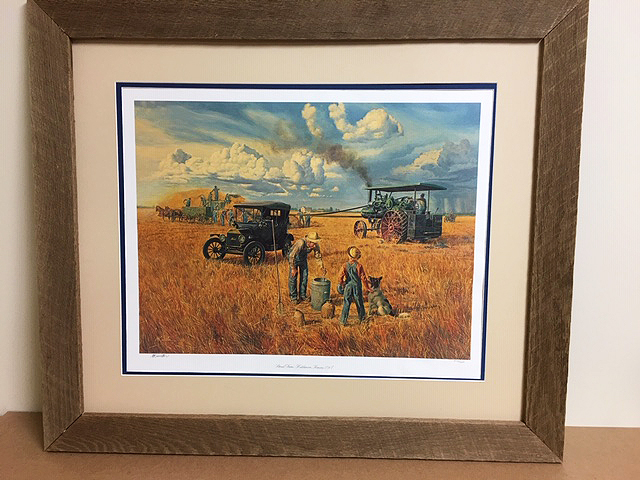
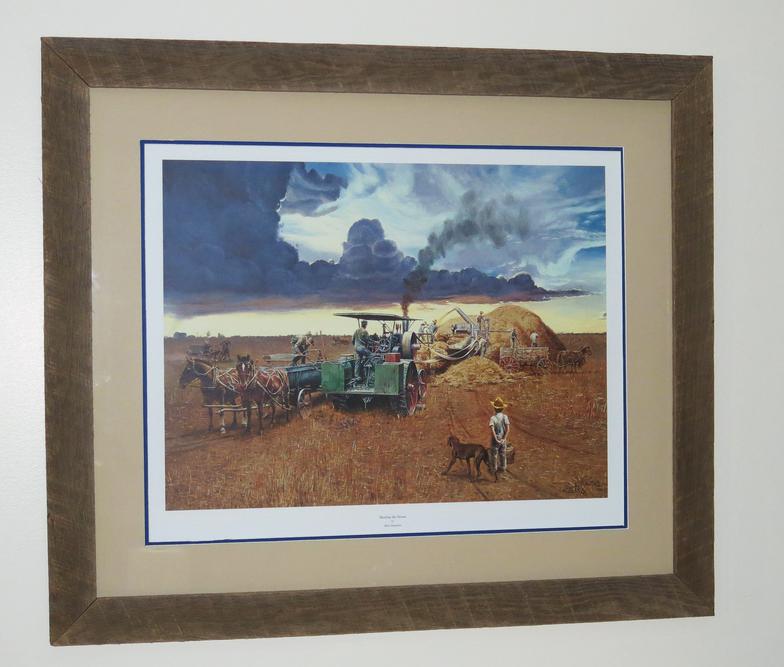
Here are the two steam engine pictures with the natural weathered frames.
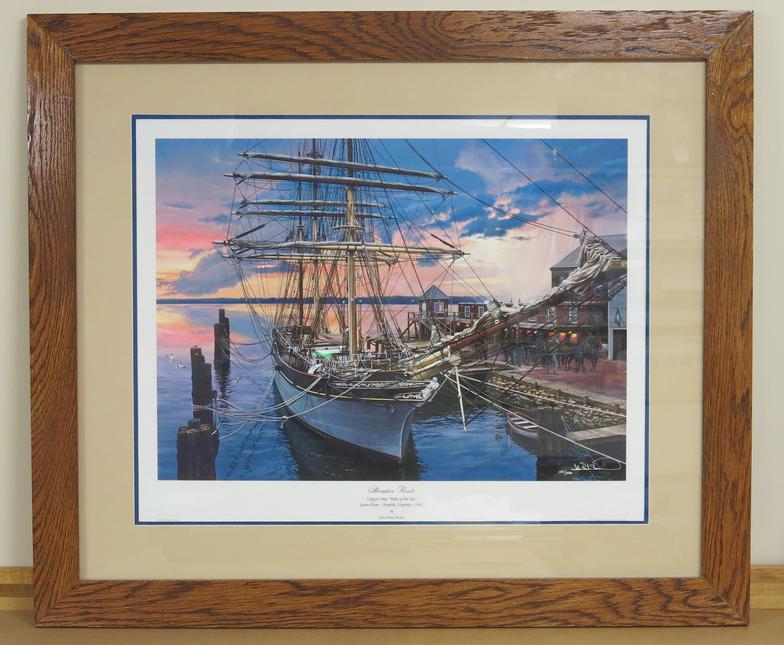
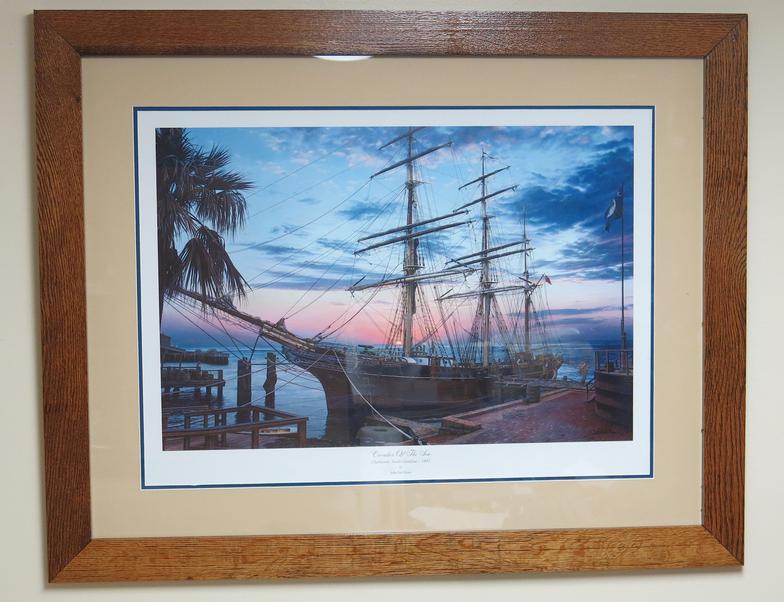
Here are the two sailing vessel framed with weathering removed down to bare wood and then stained.
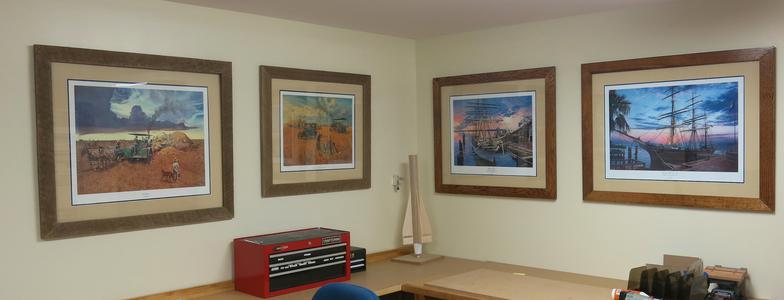
The finished project with the four framed pictures hanging. The nostalgic wood from the old corn crib has been re-purposed

Local artist Richard Clifton painted this picture. It depicts the process of taking an empty wagon to the field and returning with a wagon full of ear corn to be emptied into the corn crib. The same slats from corn crib mentioned above were used to frame this picture as well.
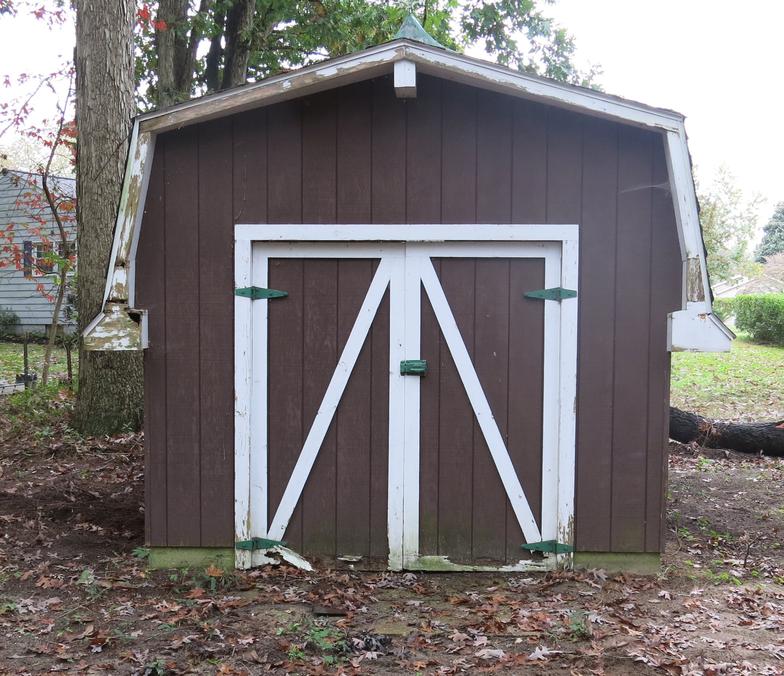
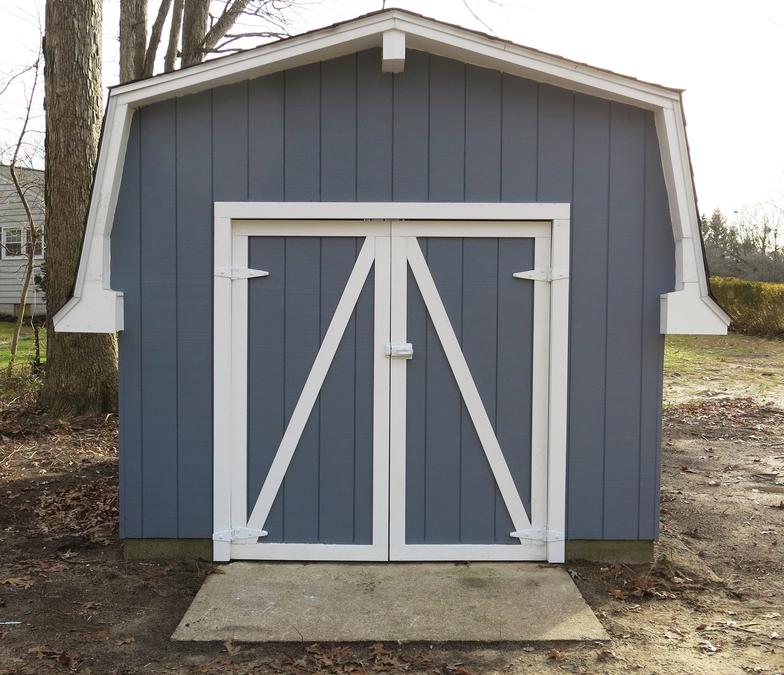
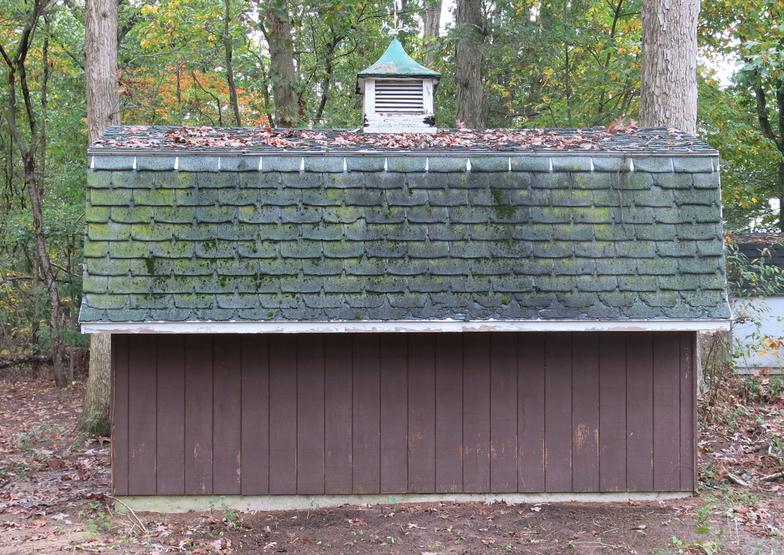
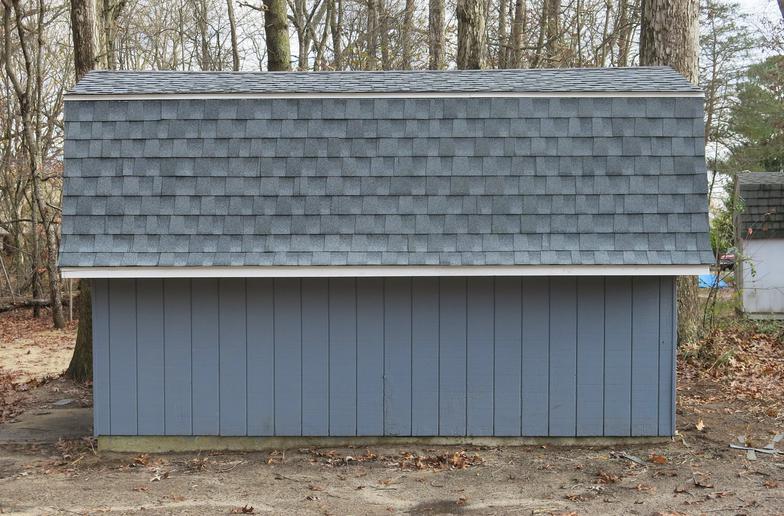
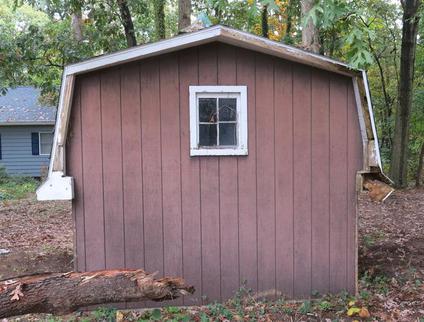
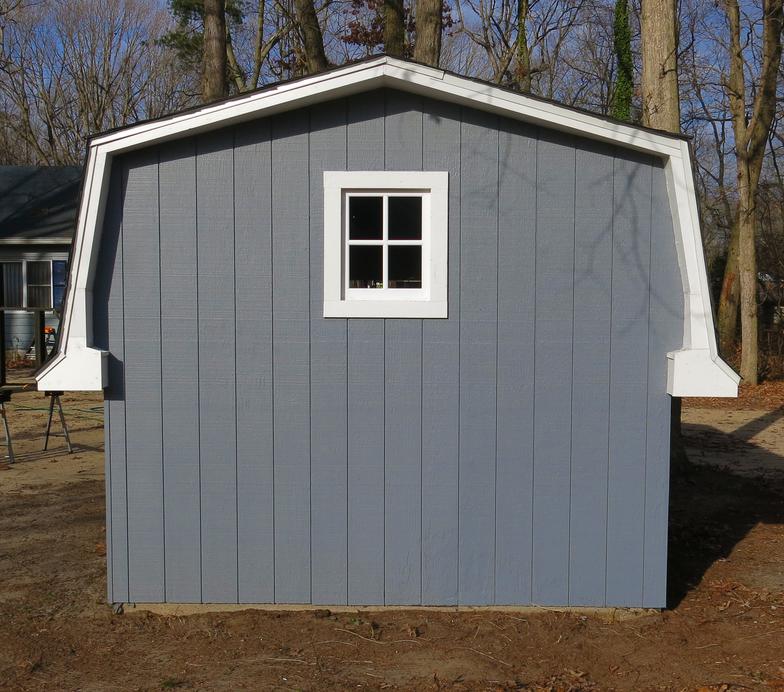
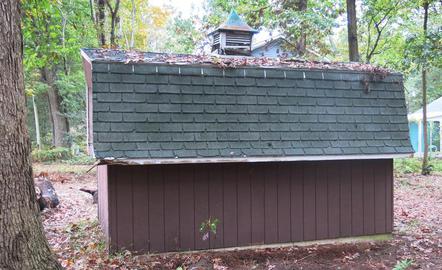
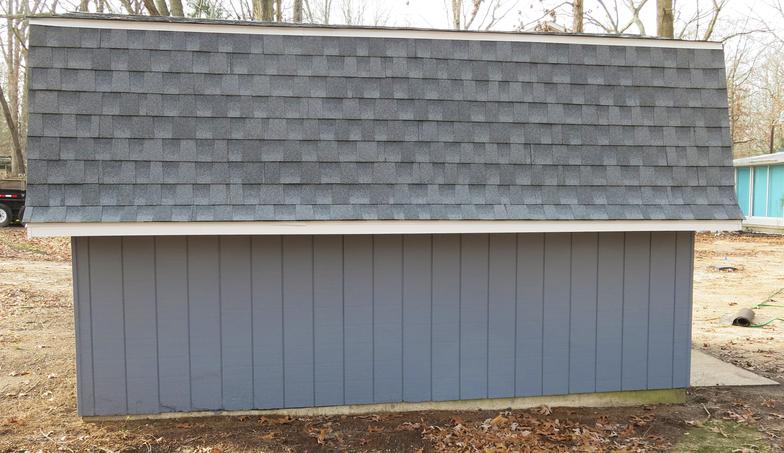
Backyard Storage Shed Renovation
The storage shed that I built in 1974 needed a complete overhaul. The project turned out to be more than originally thought, but is now complete. I did take progress pictures but I think the before and after pictures will suffice.
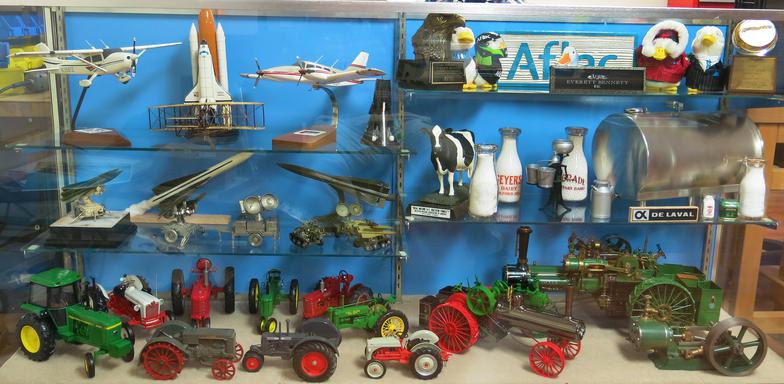
I recently found a large display case for sale that I was going to use for models. It was in rather poor condition and I did some painting, repairs, cleaning and modifications to obtains a good looking display case. I revised the thinking and decided to display some of items related to my experiences. Here is a picture of the completed display case.
Refurbished Display Case
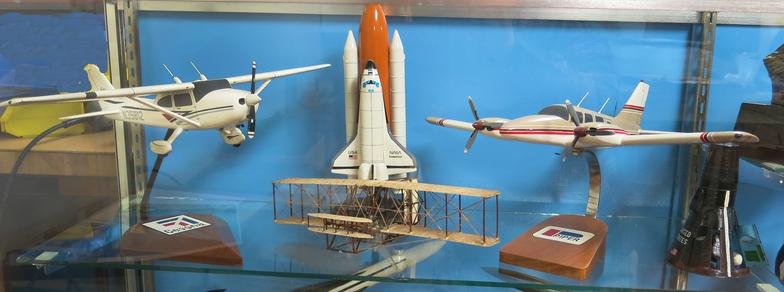
AVIATION AND SPACE. This shelf has two model aircraft of planes that I have flown a lot. A Cessna 182 and a Piper twin Seneca.
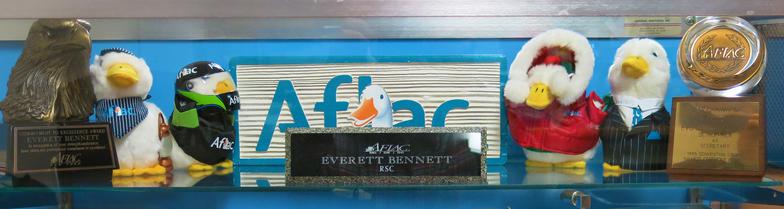
AFLAC. Here are a few of the Aflac ducks and a couple of awards representing my years as a Regional Sales Coordinator.
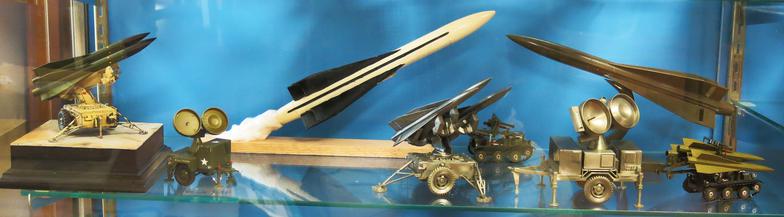
HAWK MISSILES. During my time in the Army, I was involved with the HAWK air defense missiles, including a tour in Korea.
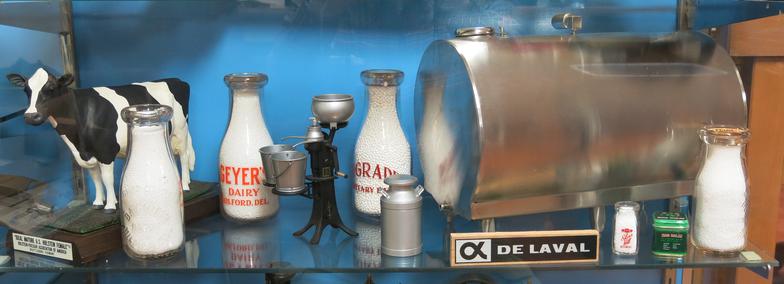
DAIRY FARM EQUIPMENT. I worked with automated dairy farm equipment for about 20 years. We were dealers for DeLaval, Mueller, Jamesway, Madison. The model tank represents a Mueller bulk milk tank. Another note is that the milk bottle placed in front of the cow is an original bottle from our family dairy farm from the 40's, Bay View Farms.
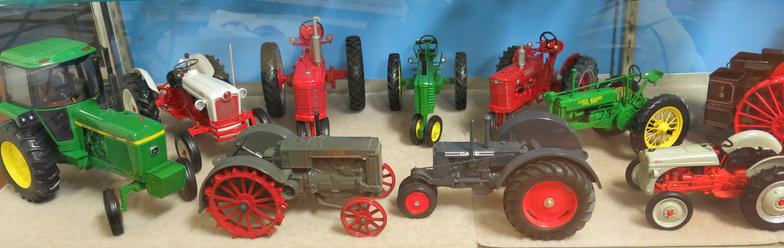
FARM TRACTORS. I have tried to have a model of some of the tractors that were used on the farm. I started driving tractors at the early age of 5. My dad used to plow with the type of dark gray tractor in the front left. The John Deere 4440 tractor on left is currently used on the farm.
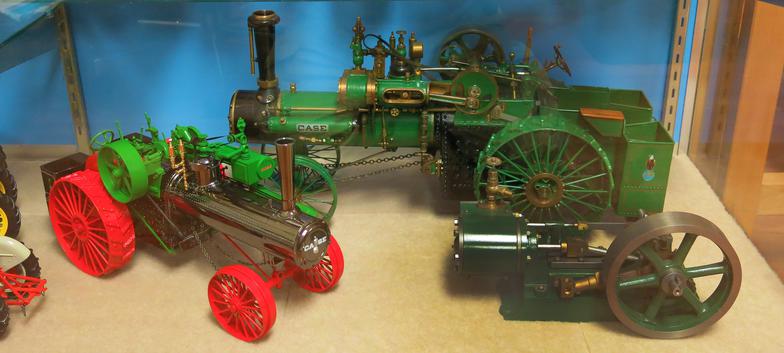
STEAM ENGINES. In the early days of farming, steam power was the norm. The 1915 CASE 65 H.P. traction engine was very popular. The larger green model is a "live steam" fully operational model of the CASE engine. The horizontal engine in the front is also a "live steam" model. The engine on the left is a display model that was issued by CASE company representing 175 years in business.

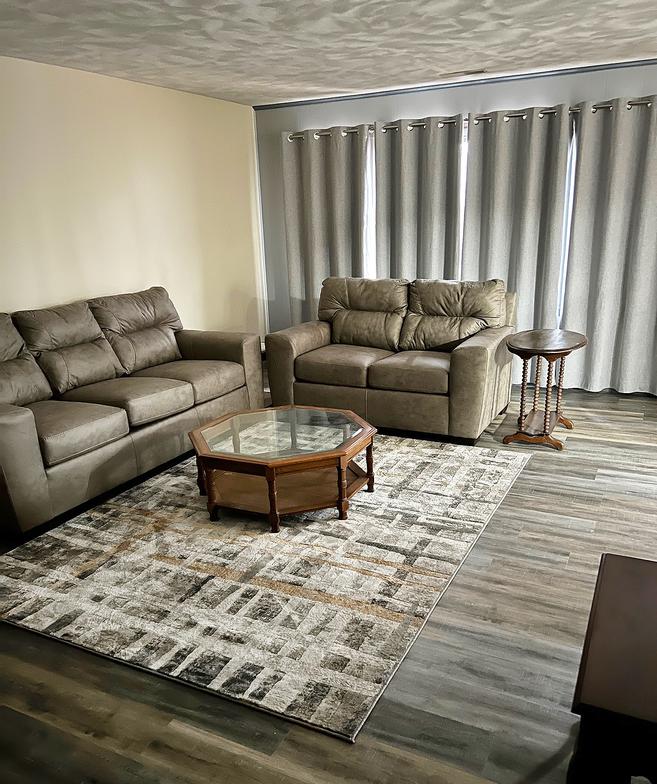
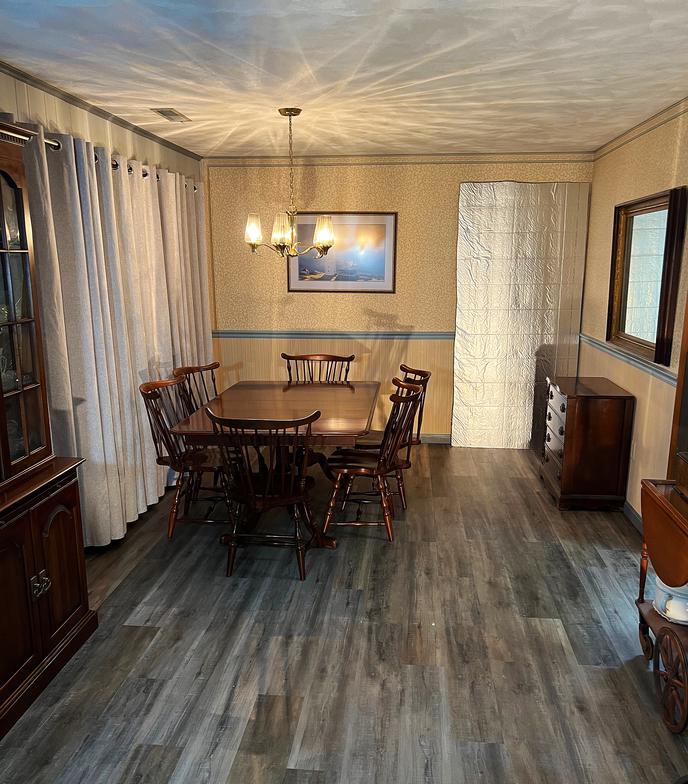
Living Room - Dining Room - Kitchen Remodeling.
View of Living Room at beginning of remodeling
Same view in Living Room nearing completion
Dining Room was also remodeled with Living Room
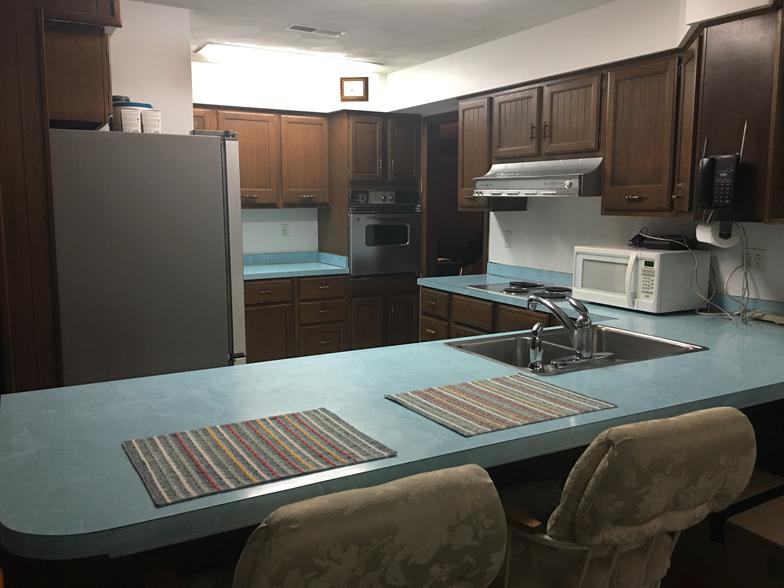
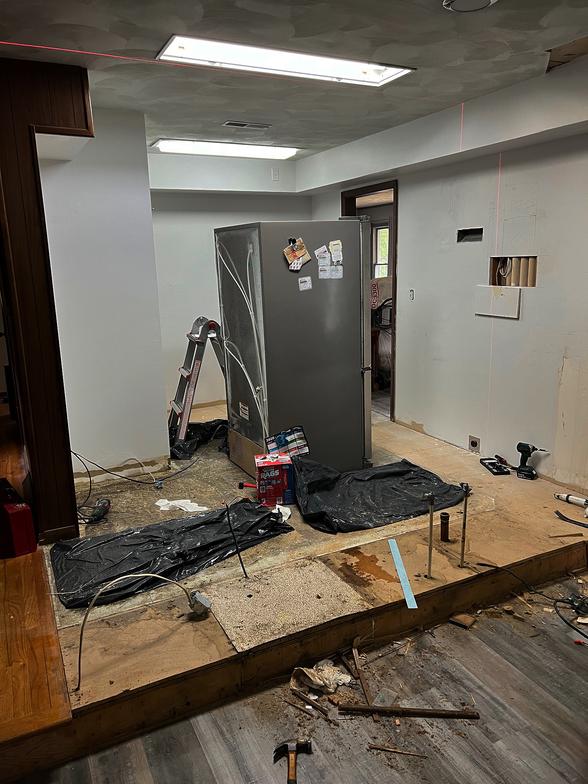
This is Kitchen area with old kitchen removed
This is old Kitchen before remodeling started. The kitchen was showing its age.
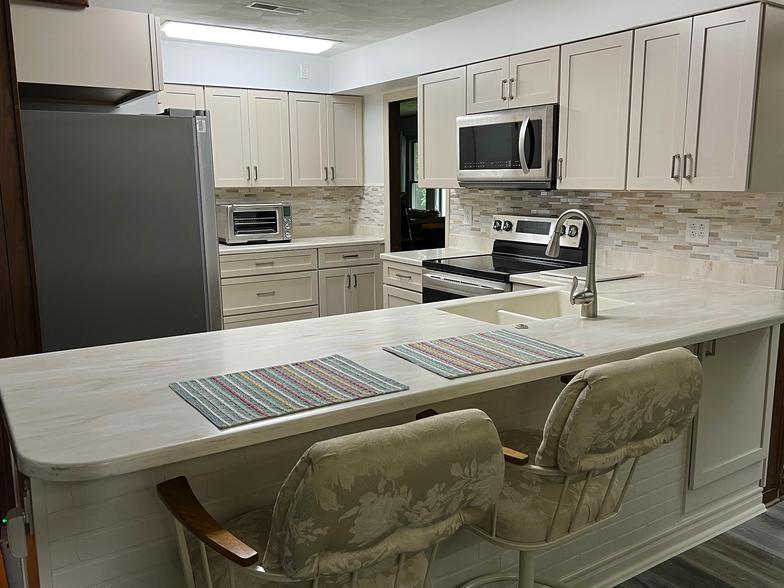
Picture of the completely remodeled Kitchen.
I am starting a new project. It will consist of stories that I have experienced and will be called MEMORABLE MOMENTS.
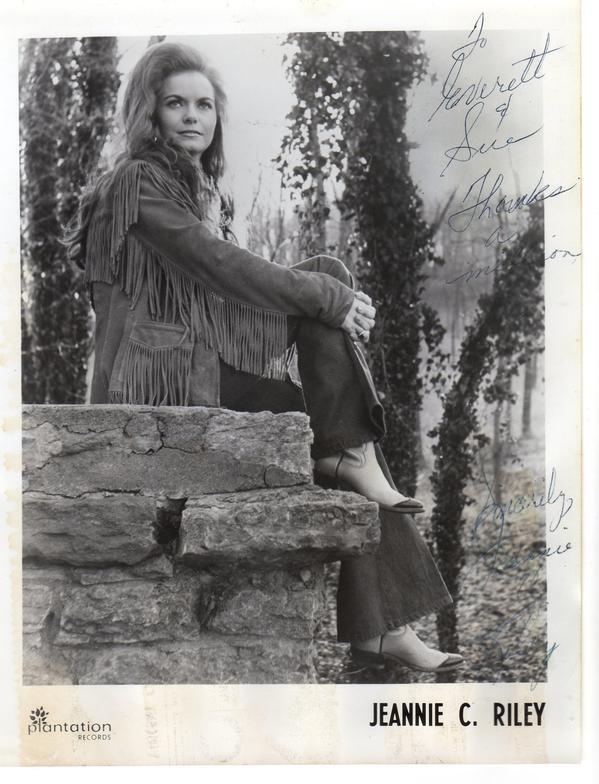
MEMORABLE MOMENTS 4 - JEANNIE C. RILEY
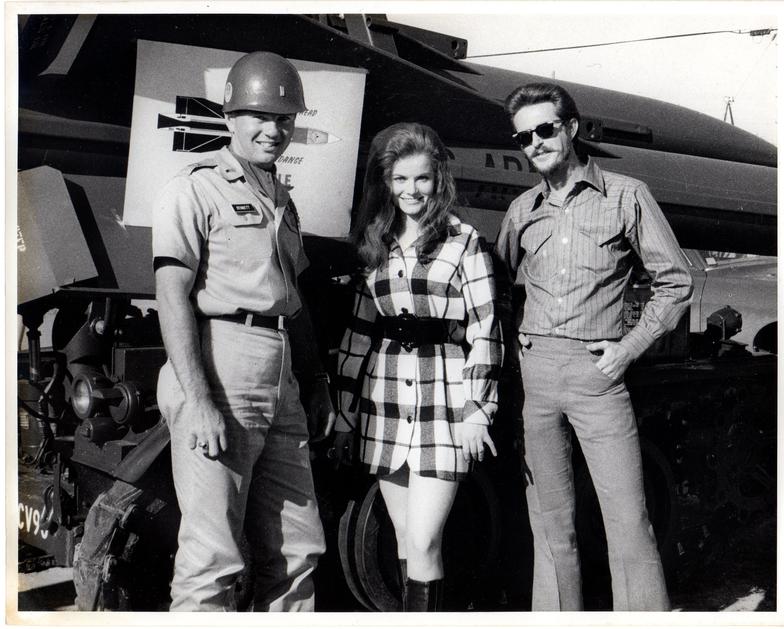
Well, some orders are just better than others. I had orders to take a detachment of men and equipment to Lubbock, Texas from Fort Bliss, Texas and provide a HAWK Missile display at the South Plains Panhandle Fair. We were TDY (Temporary Duty) for the week to set up and man the HAWK exhibit at the fair. There were some promotional pictures taken during the week. Some of the entertainment performers for the evening shows would stop by to do the pictures. One of the performers for the fair was Jeannie C. Riley. Her “Harper Valley PTA” song was very popular at the time. I have added one of the pictures taken with her. The person at right was her husband.
The story didn't end there. A year later, Jeannie C. Riley was appearing at the Delaware State Fair. I had finished my active duty tour and was able to attend. I thought it was a perfect time to give her copies of the pictures and made a packet with the pictures to give to her. I took the packet with me and approached a police officer that was around the stage area. I asked if there was any way that I could meet with Jeanie C. Riley. The response was laughter from the officer saying “Yes, you and everyone else in Delaware.” I quickly stated that this was different. I pulled a couple of the pictures out of the packet and showed them to the officer, saying that I have these for her. Upon seeing the pictures, the officer said, “Just one moment, Sir.”
In just a few moments, I was escorted to her motor coach backstage where she was waiting. I was invited inside and we sat at her “kitchen” table. I reminded her where we met and showed her the pictures as I pulled them from the packet. She was so appreciative. She explained that when she started singing, her mother started a scrap book. She went on to say that there wasn’t a lot in the scrapbook. Her explanation was that they would go do a show and after the show they would leave to go to the next location. “We typically don’t get to see the morning newspaper for any clippings.” She then went on to say that these pictures are going into my scrapbook.
When we were finished with the visit, she pulled out a picture and autographed it at the table. The autograph included a thank you written as "Thanks a million."
Here is an example